Running Your Own Email Server on RHEL
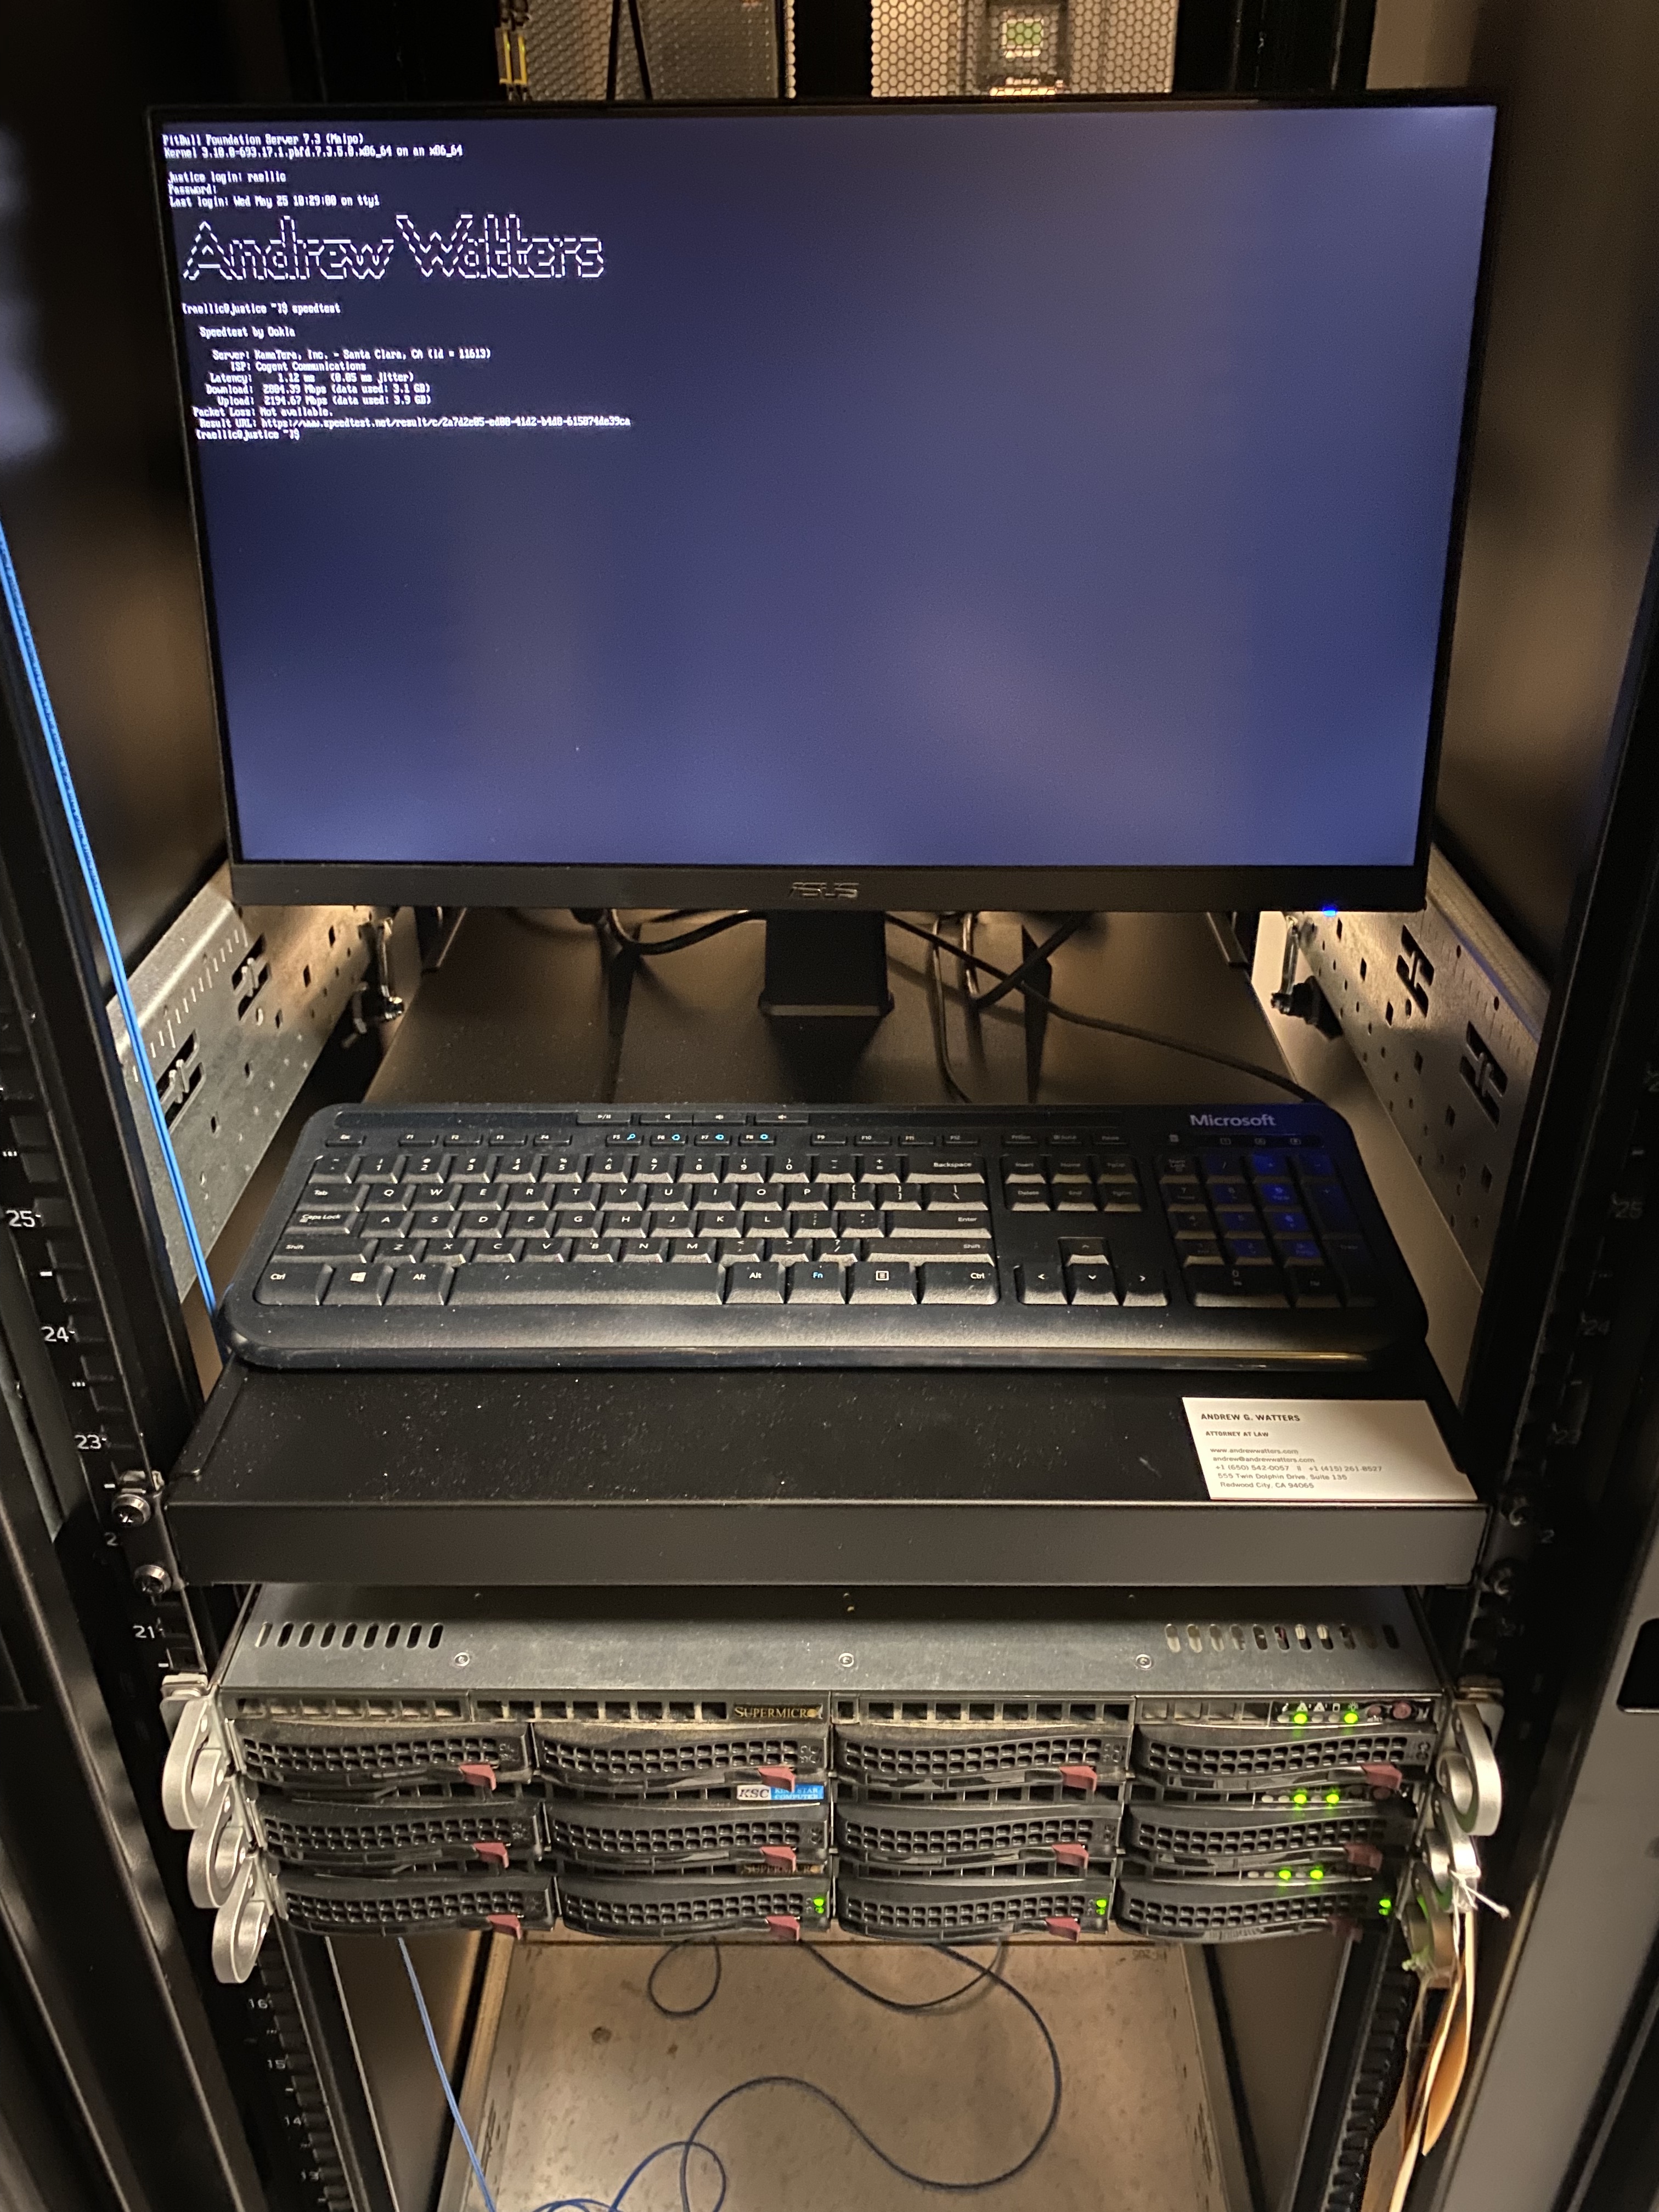
Where all the magic happens. After this, Cogent fixed my 10 gig connection and now I get 9,500 mbps (lol).
Update October 20, 2025: I'm intending to redo this page as a video walkthrough where I take a new machine and turn it into an email server. That would be really cool. I'm not sure when I'll be able to do that, but possibly later this month.
Update February 22, 2025: I've been very happy with Postfix and Dovecot over the last several years. The machines and software have performed flawlessly. I'm especially happy with my new email server, which I designed with a RAID 5 of Seagate 2X14 dual-actuator hard drives in mid-2022. Since then, I've left the data center and brought all my hardware to my office, which has been sufficient and saves a lot of money. I've been meaning to rewrite this page to cover my latest setup, which is improved over the one described in the original tutorial. No timeline, sorry.
Update January 12, 2023: Wow, that was easy. After five years with my own email server, I've transitioned my Postfix installation to LMTP for delivery with Dovecot. LMTP is required in order to use Dovecot Sieve scripts such as vacation responders, plus external programs to post-process emails. Critical for my use case of auto-filing client-related emails from my law firm.
Update October 18, 2022: Wow, that was hard. I transitioned my Rællic email to this server and it presented a number of challenges. I will do a full write-up on that in the near future. Bottom line, I had to configure virtual address mappings in conjunction with aliases in order to have andrew@andrewwatters.com and andrew@raellic.com go to different mailboxes. I also had to revise my DKIM configuration to use the same selector and key for each domain. It works!
Update July 16, 2022: I resolved the issue with Google by preferring IPv4 with Postfix. Works great!
Update June 11, 2022: I got everything working perfectly, including IPv6 (which was a huge challenge). The only issue is that now Gmail randomly blocks my emails, even with DKIM, DMARC, and SPF all properly implemented. I've found that re-sending the email a few minutes later and also adding the recipient's first name in the first line of the email seem to help. I haven't had any issues with other providers after adding Reverse DNS/PTR records through my ISP at the data center, Cogent. Cogent customer support is excellent, by the way-- I sent the request and within 30 minutes they had the PTR entries done, and the engineer even called me to check in. Anyway, this tutorial needs to be revised substantially-- I just have to find the time to do it (lol) on top of my regular work. Working on it! Will post my exact configuration so that others can replicate it. There were snags and small triumphs throughout the process, mostly related to configuring SELinux, but now I am declaring victory.
Update May 28, 2022: I finally got the new server installed in the data center, so I'm in the midst of configuring it. I'm amazed at how good RHEL 8 is and how easy it is to get everything installed. Also, I've learned a lot in the last five years since first attempting my own email. I will have DKIM, DMARC, and SPF all running on this like I do on my current law firm portal server, but it will take 1/10th the time I originally spent. Check back soon!
Update April 6, 2022: Okay, I know the way forward. I'm going to set up a new email server for me and my wife to use in our community business ventures. This tutorial will be fully revised and will be a proper tutorial in the next few weeks. Check back soon!
Update March 13, 2022: well, I'm not sure I'm ever going to finish this. It was an interesting adventure running my own email server, which I still do on a limited basis as part of my law firm for sending out announcements from my web control panel. Sometimes people reply to the notification address, and I don't want to miss any messages, so this is still a valid concept. The fact is, the commercial providers are so good at email (I personally use Gmail), with user-friendly web configuration, that a personal Postfix email server makes no sense for 99.999% of people. For that last 0.001%, this tutorial is not necessary. Not sure what I'm going to do here...lol.
Update August 5, 2019: I finally got DKIM and SPF working in connection with a notification/mailing list feature that I added to my law practice web control panel, which led me to revisit this tutorial. I intend to complete the tutorial in the near future, including DKIM and SPF.
Update March 14, 2018: I have decided to transition my own email server to a commercial provider. It was interesting running this server for about a year. That was a year full of headaches and uncertainties regarding my configuration, which was occasionally hacked and used to send spam due to my failure to recognize security holes. Protip: by default, the Postfix user authorization table permits all valid users on the server to send mail, even if they cannot connect via SSH. So for example, when I briefly had the postgres user password set to "postgres" for testing, I forgot to change it. Someone guessed the password and used the postgres user to send tens of thousands of spam messages before I caught the issue (which happened when I started getting spam notices from other email servers when sending email). Bottom line: running your own email server is an interesting exercise but it seriously dangerous and difficult. I have enough going on that I no longer want to worry about it. I never completed this tutorial, which I still plan to do at some point.
June 11, 2022
This is a tutorial for absolute beginners. I originally published it in 2017, but it's been updated with my latest experience redoing my setup in a data center.
Introduction
There comes a time in a person's life when he wants to run his own email server. This can be as fleeting as a simple wish to have more control, or as serious as a bucket list item. In my case, it was a combination of both. eighteen years ago in 2004, almost to the day, I started using DreamHost for my web hosting and email. It was decent during the following thirteen years until 2017 when I started using my own systems, but DreamHost was never great. There were several serious problems with it, including: (1) their SSL certificate never matched their mail server's host name in the entire thirteen years I was with DreamHost, so I would always get a security warning, (2) spam filtering was extremely ineffective, and I ended up with thousands of messages in my Junk mailbox that I had to comb through just to be sure I didn't miss anything important, (3) there was no way to control sender access to my inbox, so literally any spammer in the world could send me email, (4) I had no way of moving messages around on the server manually, (5) I had no way of blocking any harassers, and finally (6) it was not possible to back up my email manually. The last straw was recent, and deal-breaking: my email started getting flagged as spam by major providers such as GMail and Yahoo. As a lawyer, I have to be sure that my email gets through to clients, so this was unacceptable. In any case, all of these problems were solved when I started hosting my own email, though I lost all my Raellic emails between 2012 and 2019 when DreamHost deleted them through an automated process (sad). I should have done this many years ago, no joke.
The purpose of this tutorial is to help you get your own email server up and running, and actually usable for professional work. Here is what you need to replicate this setup:
- A server running RHEL with an active subscription
- A business-class internet connection such as Cogent (their fiber DIA is excellent)
- Static IPv4 and IPv6 addresses that are clean, i.e., not on any spam blacklists
- Access to your MX record
- A SSL certificate for your correct hostname
- Postfix
- Dovecot
- Fail2Ban
- OpenDKIM
- Postfix-SPF
- Optional: Reverse DNS/PTR records
SELinux notes 
SELinux has several quirks that require manual configuration changes when setting up an email server. First, the user mail directories must be of type mail_home_rw_t in order for the Dovecot vmail user to write to them. This is super annoying, but it is what it is. All you have to do is issue this command on those directories when you create them:
sudo chcon -t "mail_home_rw_t" .sudo setsebool -P httpd_enable_homedirs true
sudo setsebool -P httpd_read_user_content onsudo chcon -t "cert_t" *.keyConnection Requirements
You need a reliable, always-on connection so your mail server is always accessible to someone who wants to send you email. You also need a static IP address so that your IP address can be evaluated against spam blacklists and so that you can have a real, fully qualified host name. Before starting this project, make sure your new IP address is not on any spam blacklists by using Spamhaus's lookup tool. If your IP is on there, you need to have it removed by following the instructions on the Spamhaus website before coming back to this tutorial. As for Reverse DNS and PTR records, an ISP like Cogent will do this for you, you just have to ask. Use this handy online Reverse DNS calculator to get the right PTR record to supply to your ISP. If you're lucky enough to have your own entire IPv4 /24, you can do your own DNS, but that's beyond the scope of this tutorial.
DNS Configuration
The MX record tells external mail servers where to find your server on the internet. This part is really easy. All you do is enter "10 [your host name]" which sets that host name as the highest priority mail server.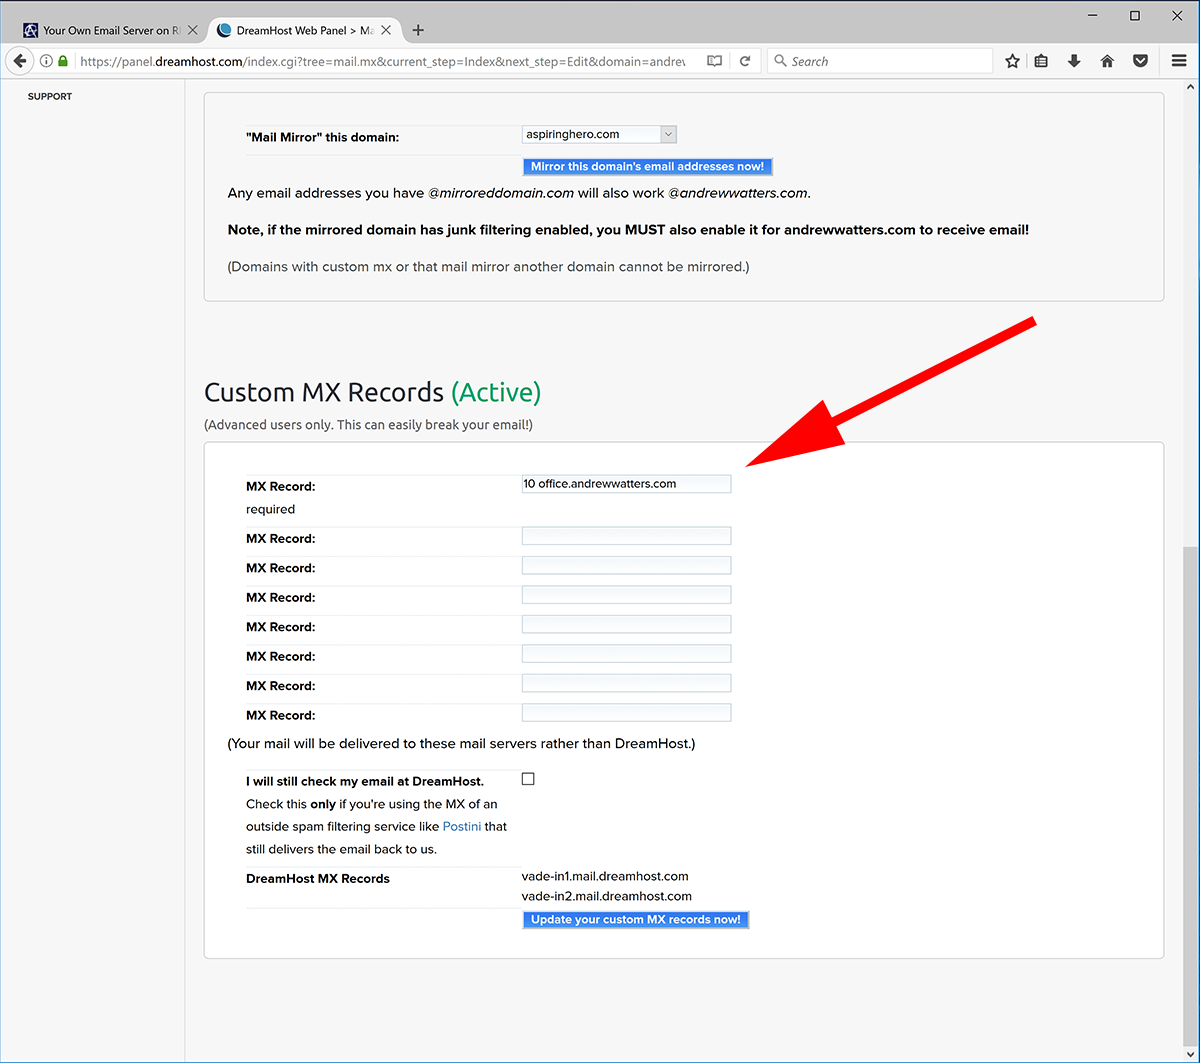
Keep in mind that once you click that button, you are responsible for your own email from that point forward. Also, your old email will stop working immediately, so you had better back up or transfer your old emails using a method of your choice. You can set up backup mail servers if you like, but I wouldn't bother because mail servers will re-try sending if your server is down, giving you ample time to get it back up and running.
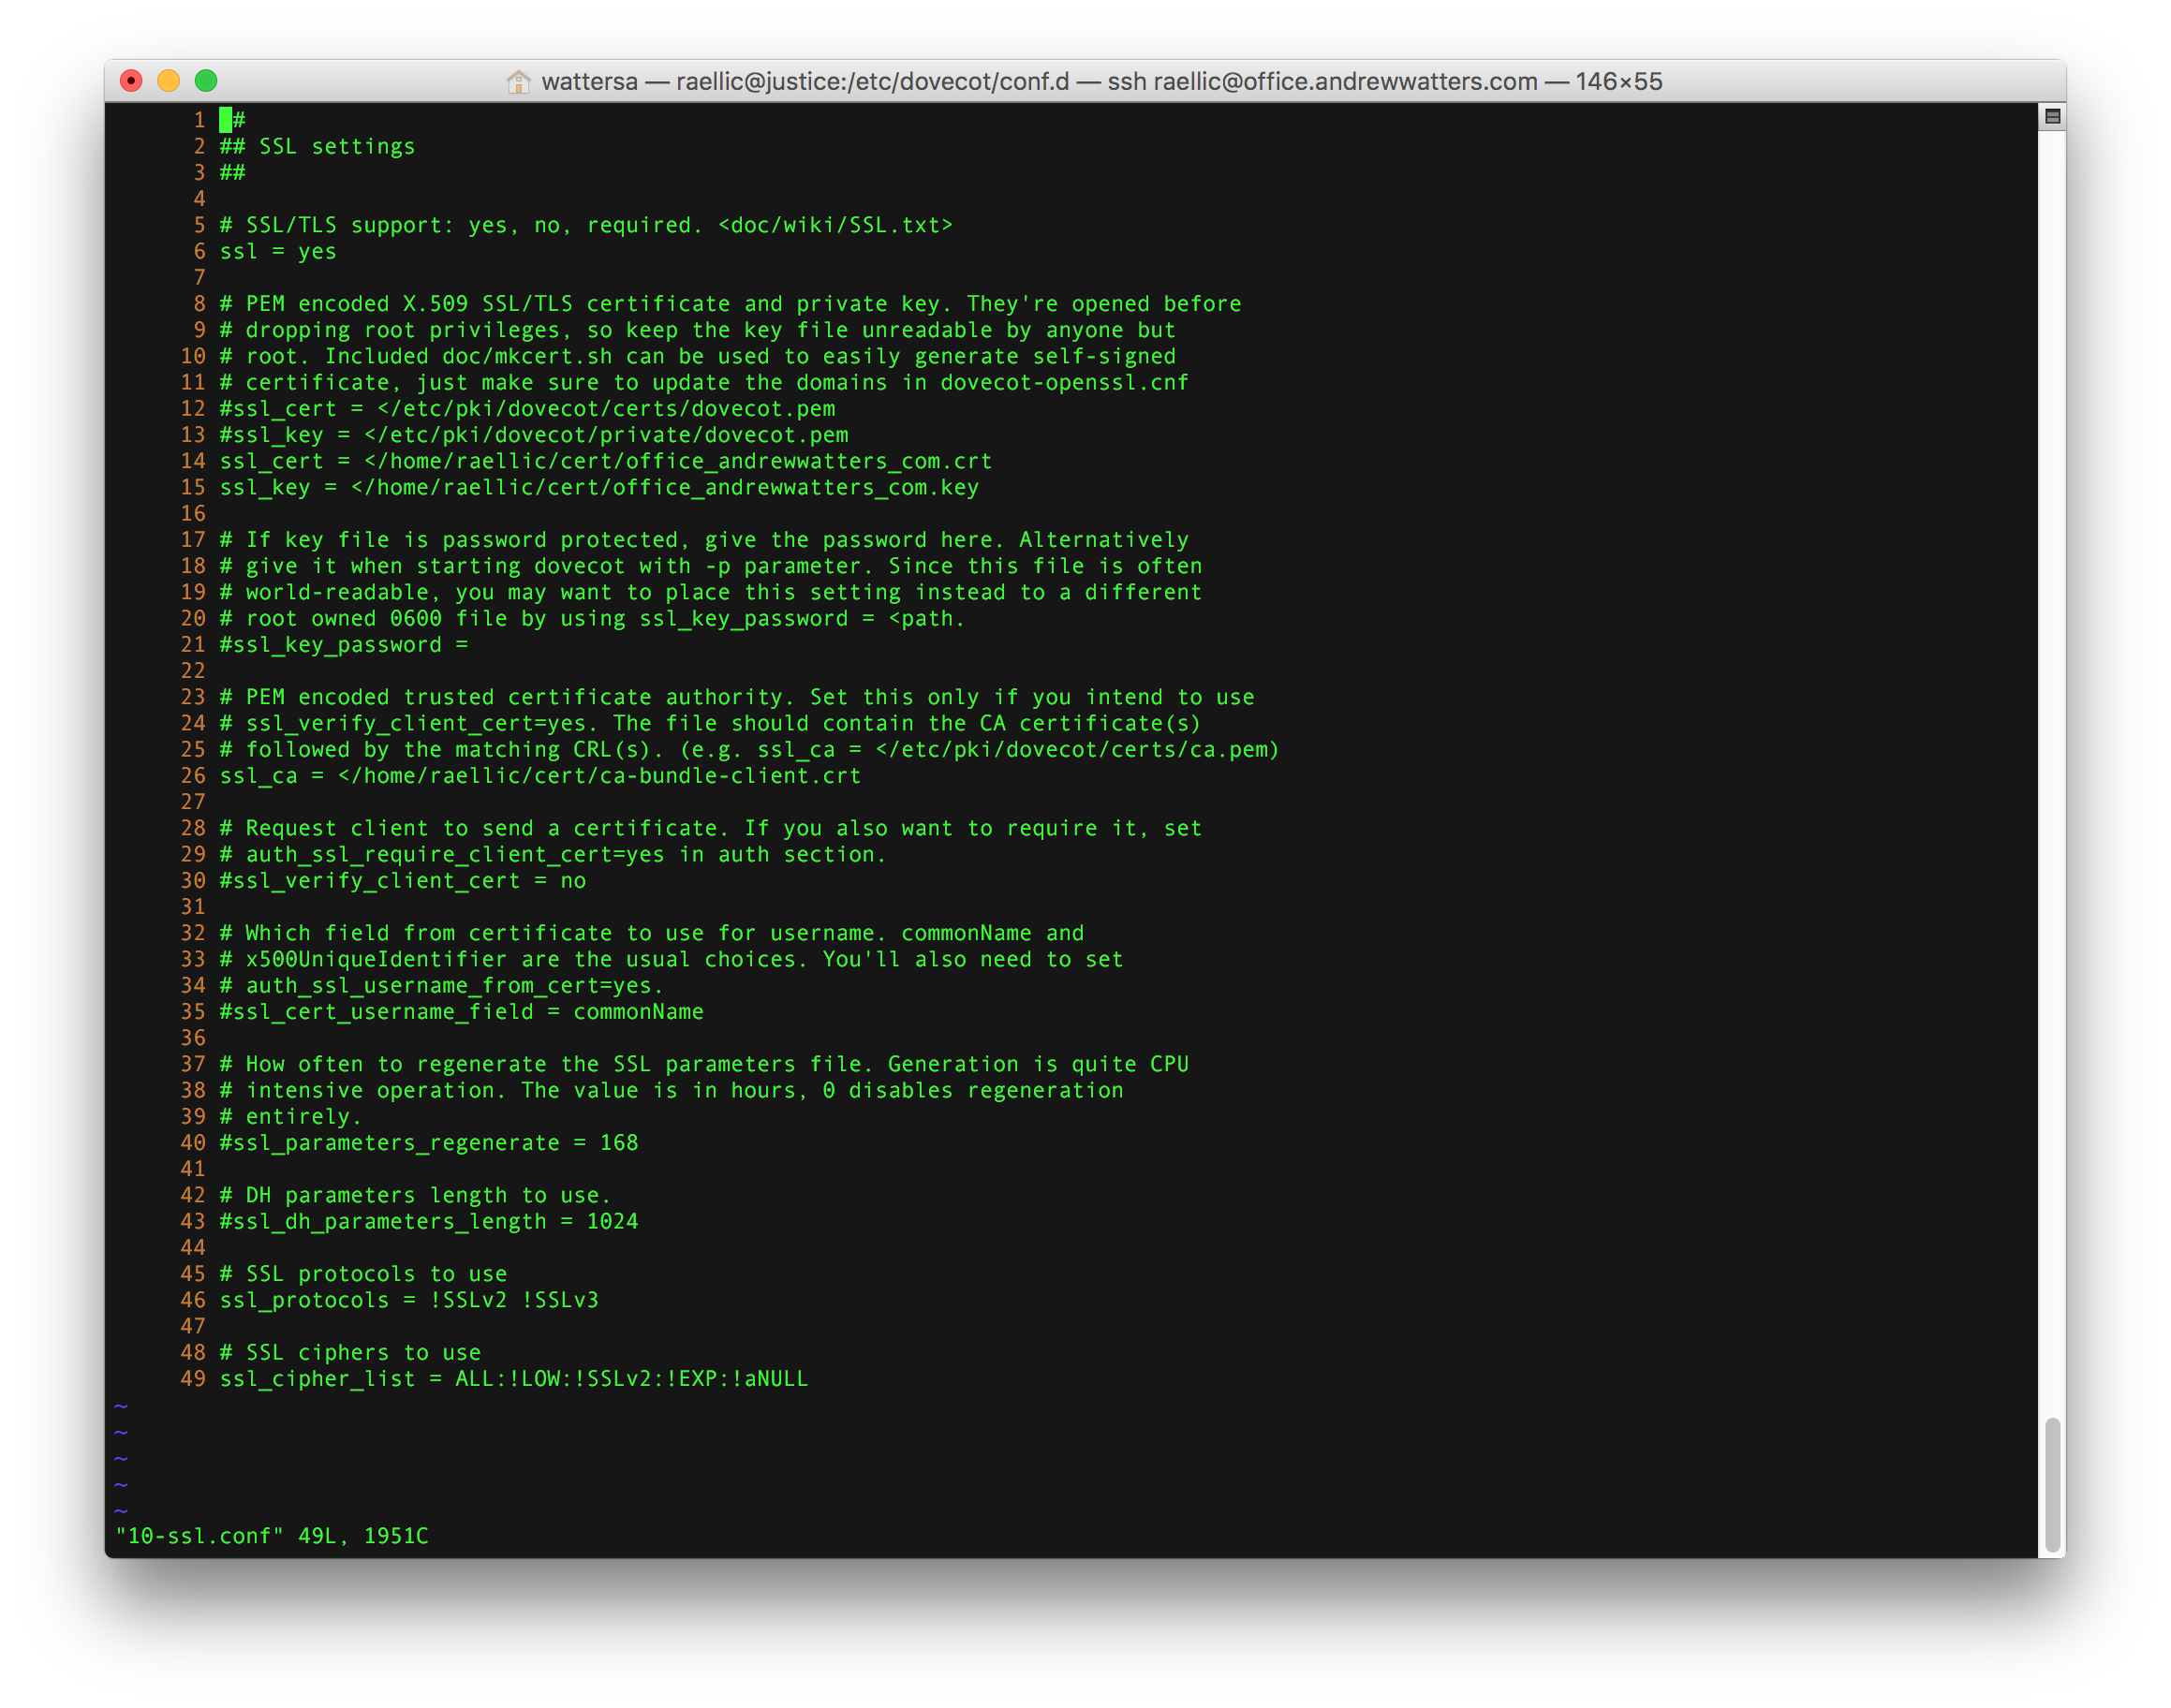
SSL Certificate
It's critical that you have a SSL certificate so that you can have a secure, TLS-encrypted connection between your email program and the server without using a self-signed certificate. Otherwise, your password will be transmitted in plain text and anyone between your email program and your server will have complete access to your email (and potentially your server). Also, you want a SSL certificate so you can receive TLS connections from other mail servers. You don't need anything fancy like an Extended Validation certificate. Just get something from a recognized certificate authority such as SSL.com. Once you are approved, you should have three things: (1) your certificate, (2) your private key, and (3) a certificate authority bundle. You will need each of these items when setting up Postfix below. For now, just make sure you have the three items on your server.
External Firewall Configuration
I have a security appliance between the internet and my server. It runs the pfSense operating system and is very effective. To get email running, you need to forward ports 25, 143, 587, and 993 from the internet to your mail server. Port 25 is for SMTP, port 143 is for IMAP, port 587 is for secure SMTP ("Submission"), and port 993 is for secure IMAP. Here is what my external firewall configuration looks like: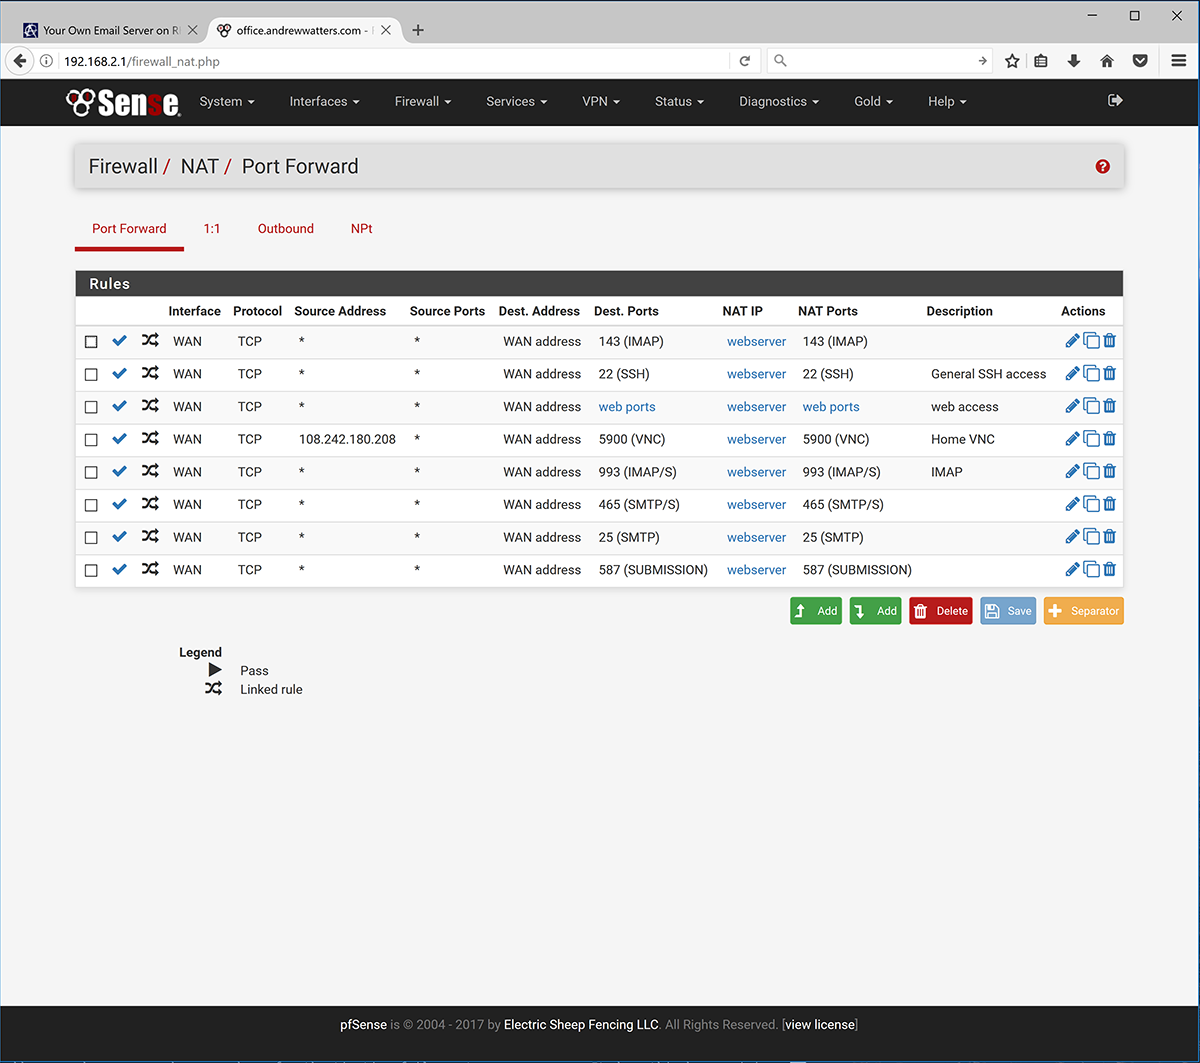
I have also forwarded port 465 in case I feel like using Outlook Express as my email program.
Server Firewall Configuration
In addition to forwarding the above four ports to your mail server, you must ensure that these ports are open on your mail server. The easiest way to do this is to use the RHEL graphical firewall utility and add the ports one by one. Or you can issue commands following this tutorial on firewalld. Open at least the following services: imap imaps smtp smtp-submission smtps. Note that submission is not "submission" but is "smtp-submission."
Postfix
Postfix is a great mail server. It has numerous features and performs very well. It's also free, well-maintained, and well-supported. This make Postfix the natural choice for someone running his own email server. Postfix handles sending and receiving mail between your server and the internet. In other words, it does not handle delivery of email to local users. That's what Dovecot is for. Postfix is included in RHEL, but you should make sure you have the latest RHEL-approved version:
sudo yum update postfix
Before you start the Postfix service, you have to configure everything properly. First, create a new user who will be the mail delivery user. This can be anything from "vmail" to "justicewarrior" or anything in between. You should make the user a non-shell user for added security using the -r option when you create the user. I personally used to run my first email server with my main user as the mail delivery user, but that's a bad idea. So this time around, I created user "vmail" and group "vmail" and went with that.
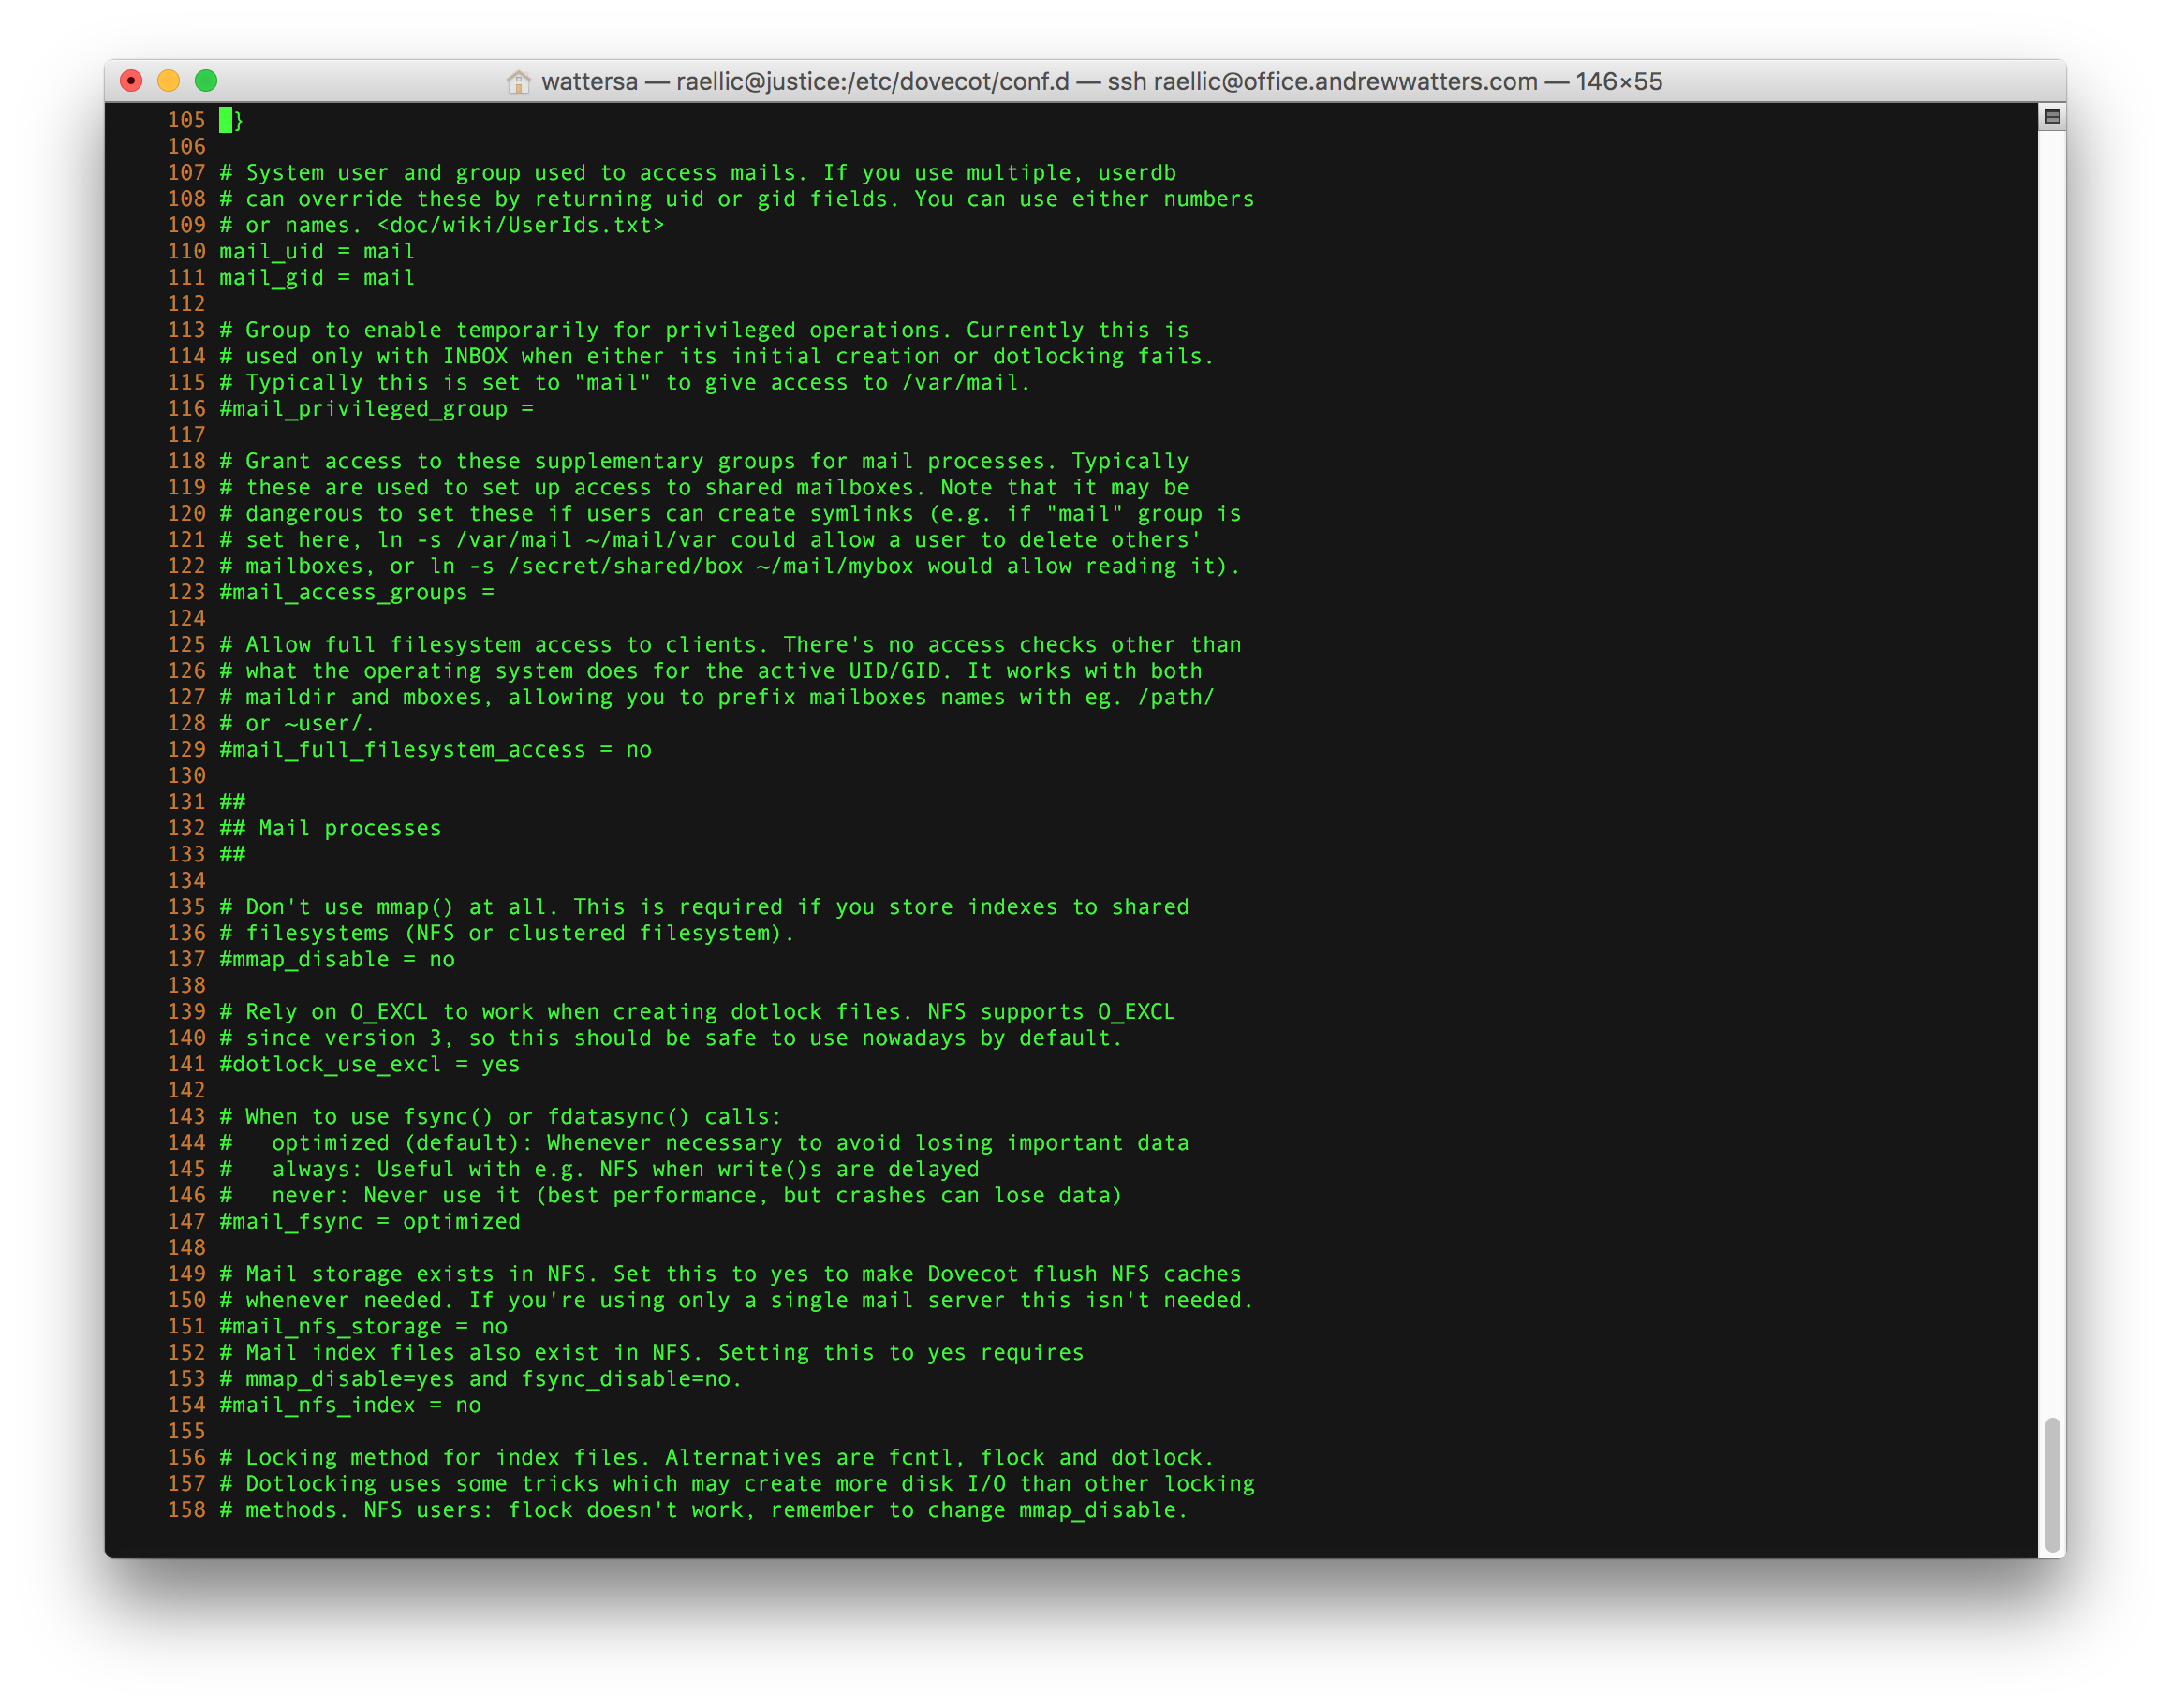
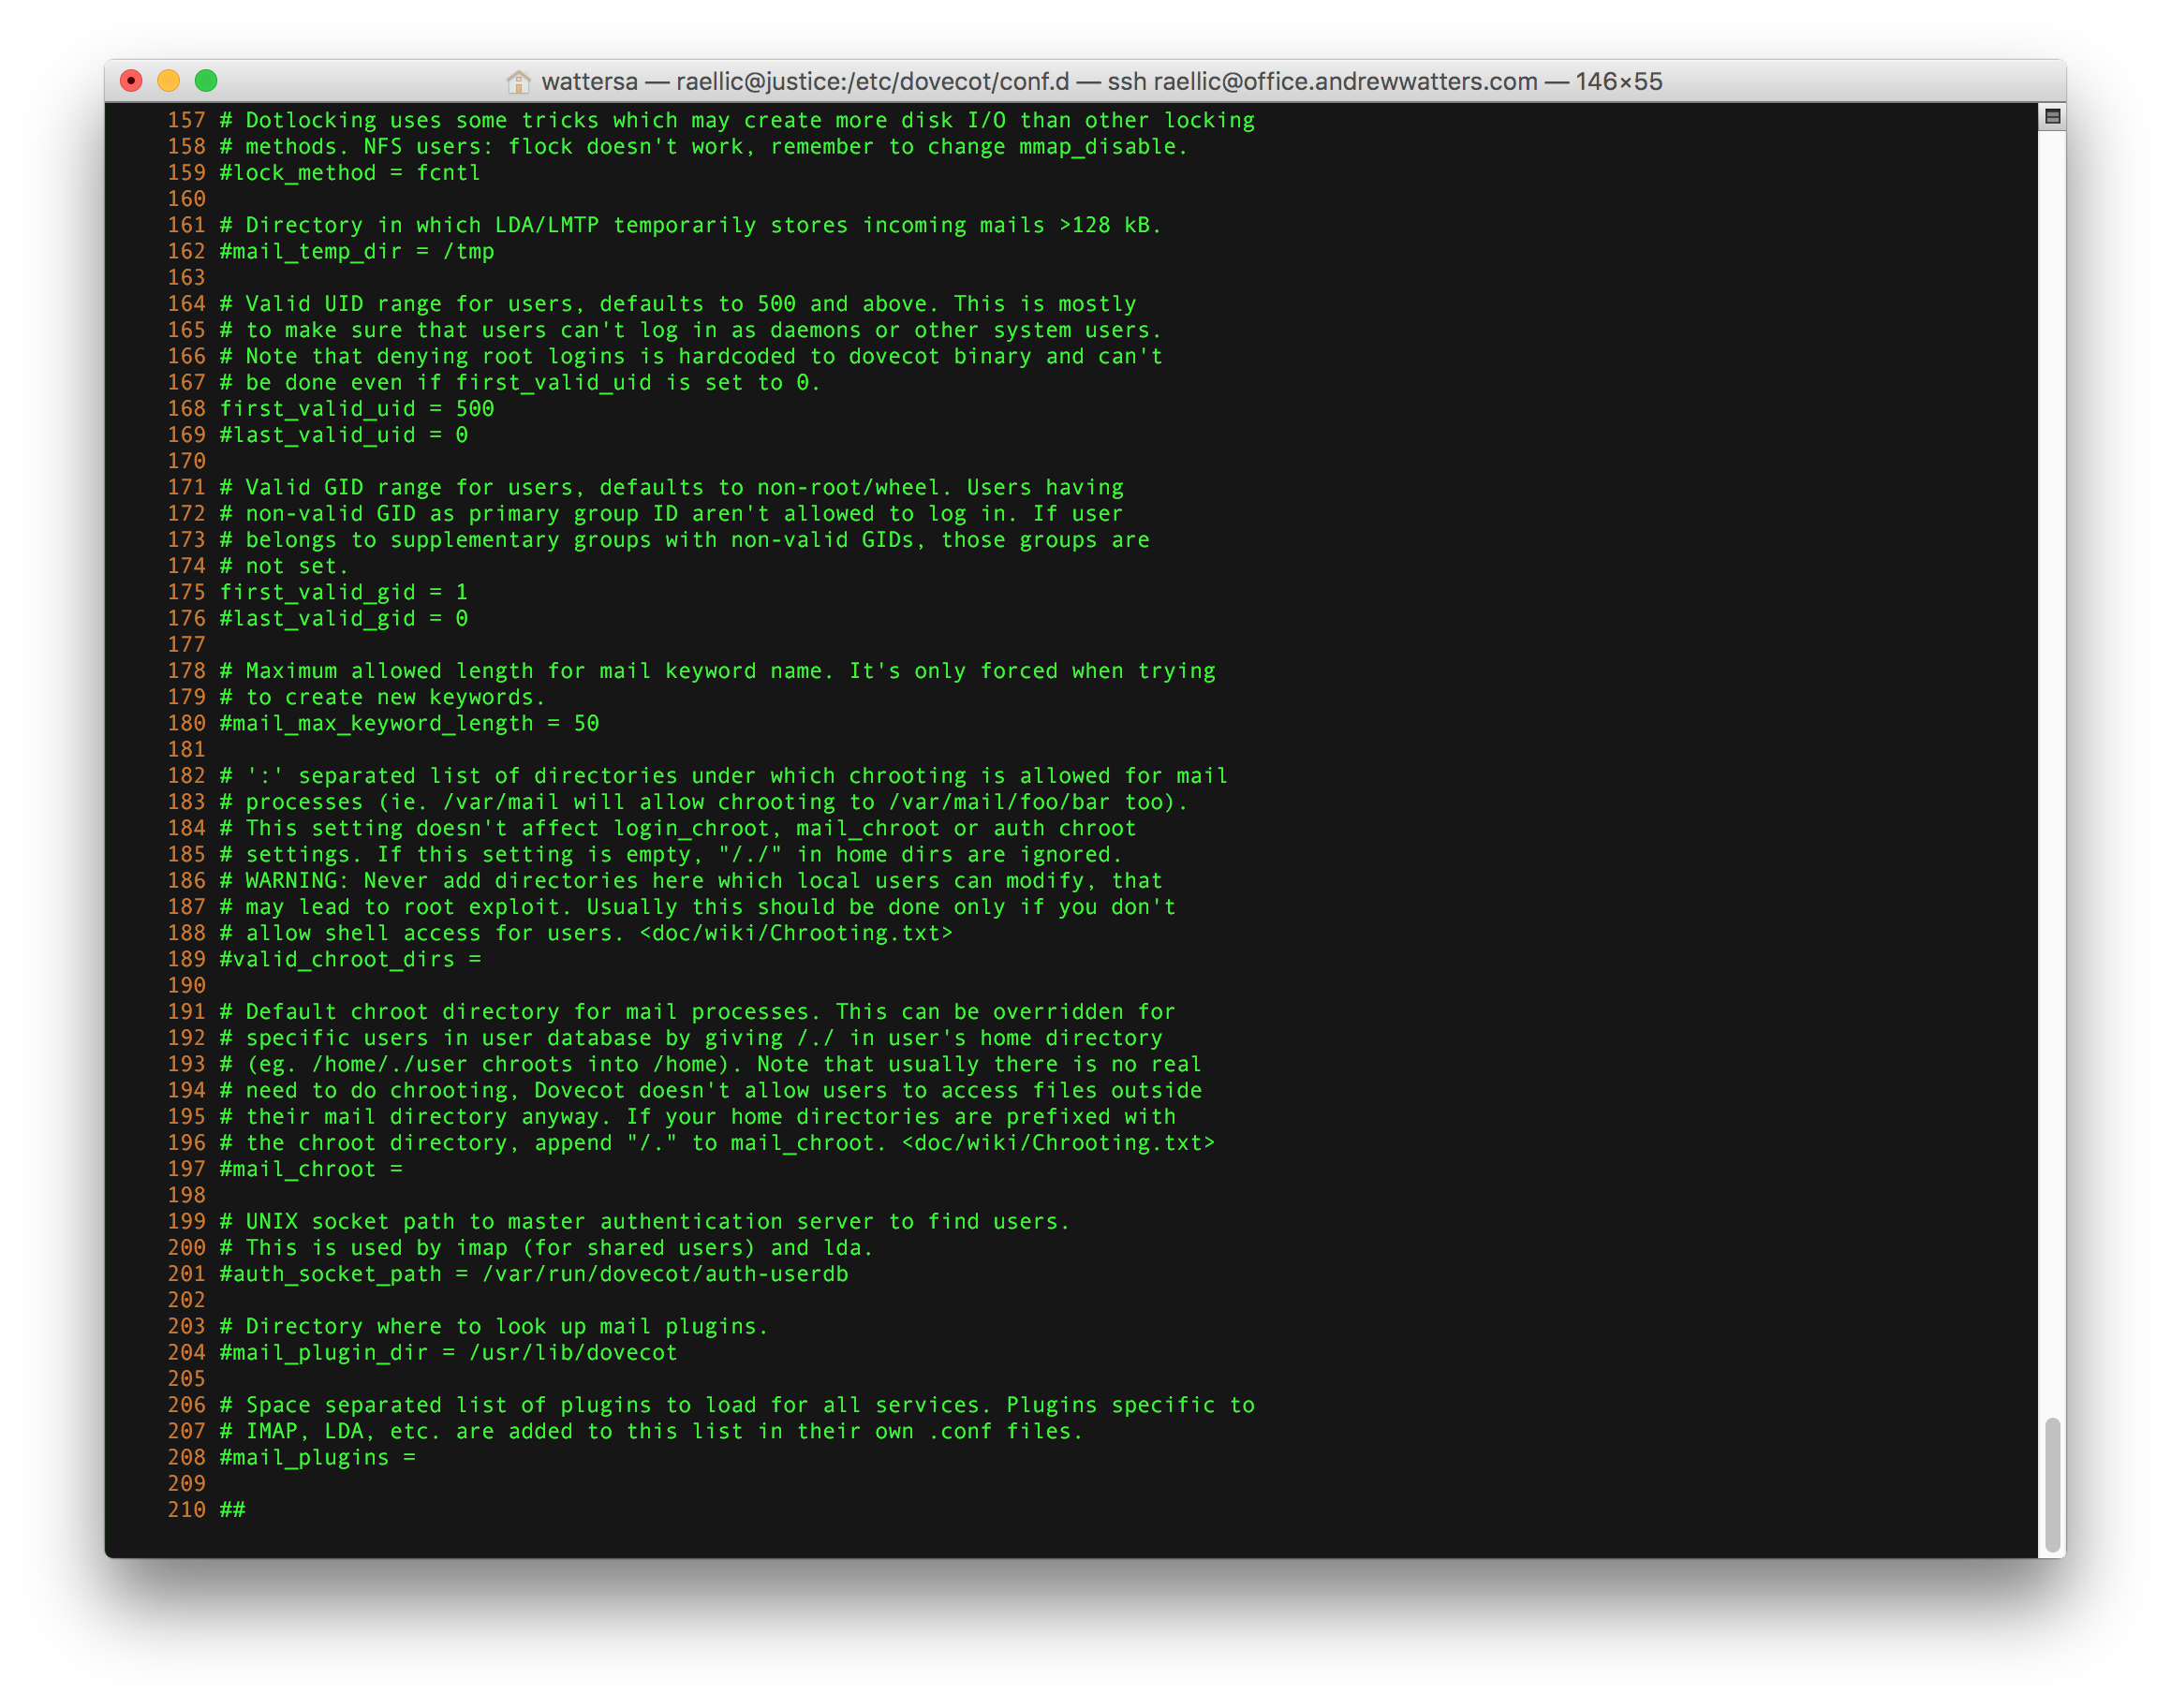
The Postfix configuration directory is found at /etc/postfix/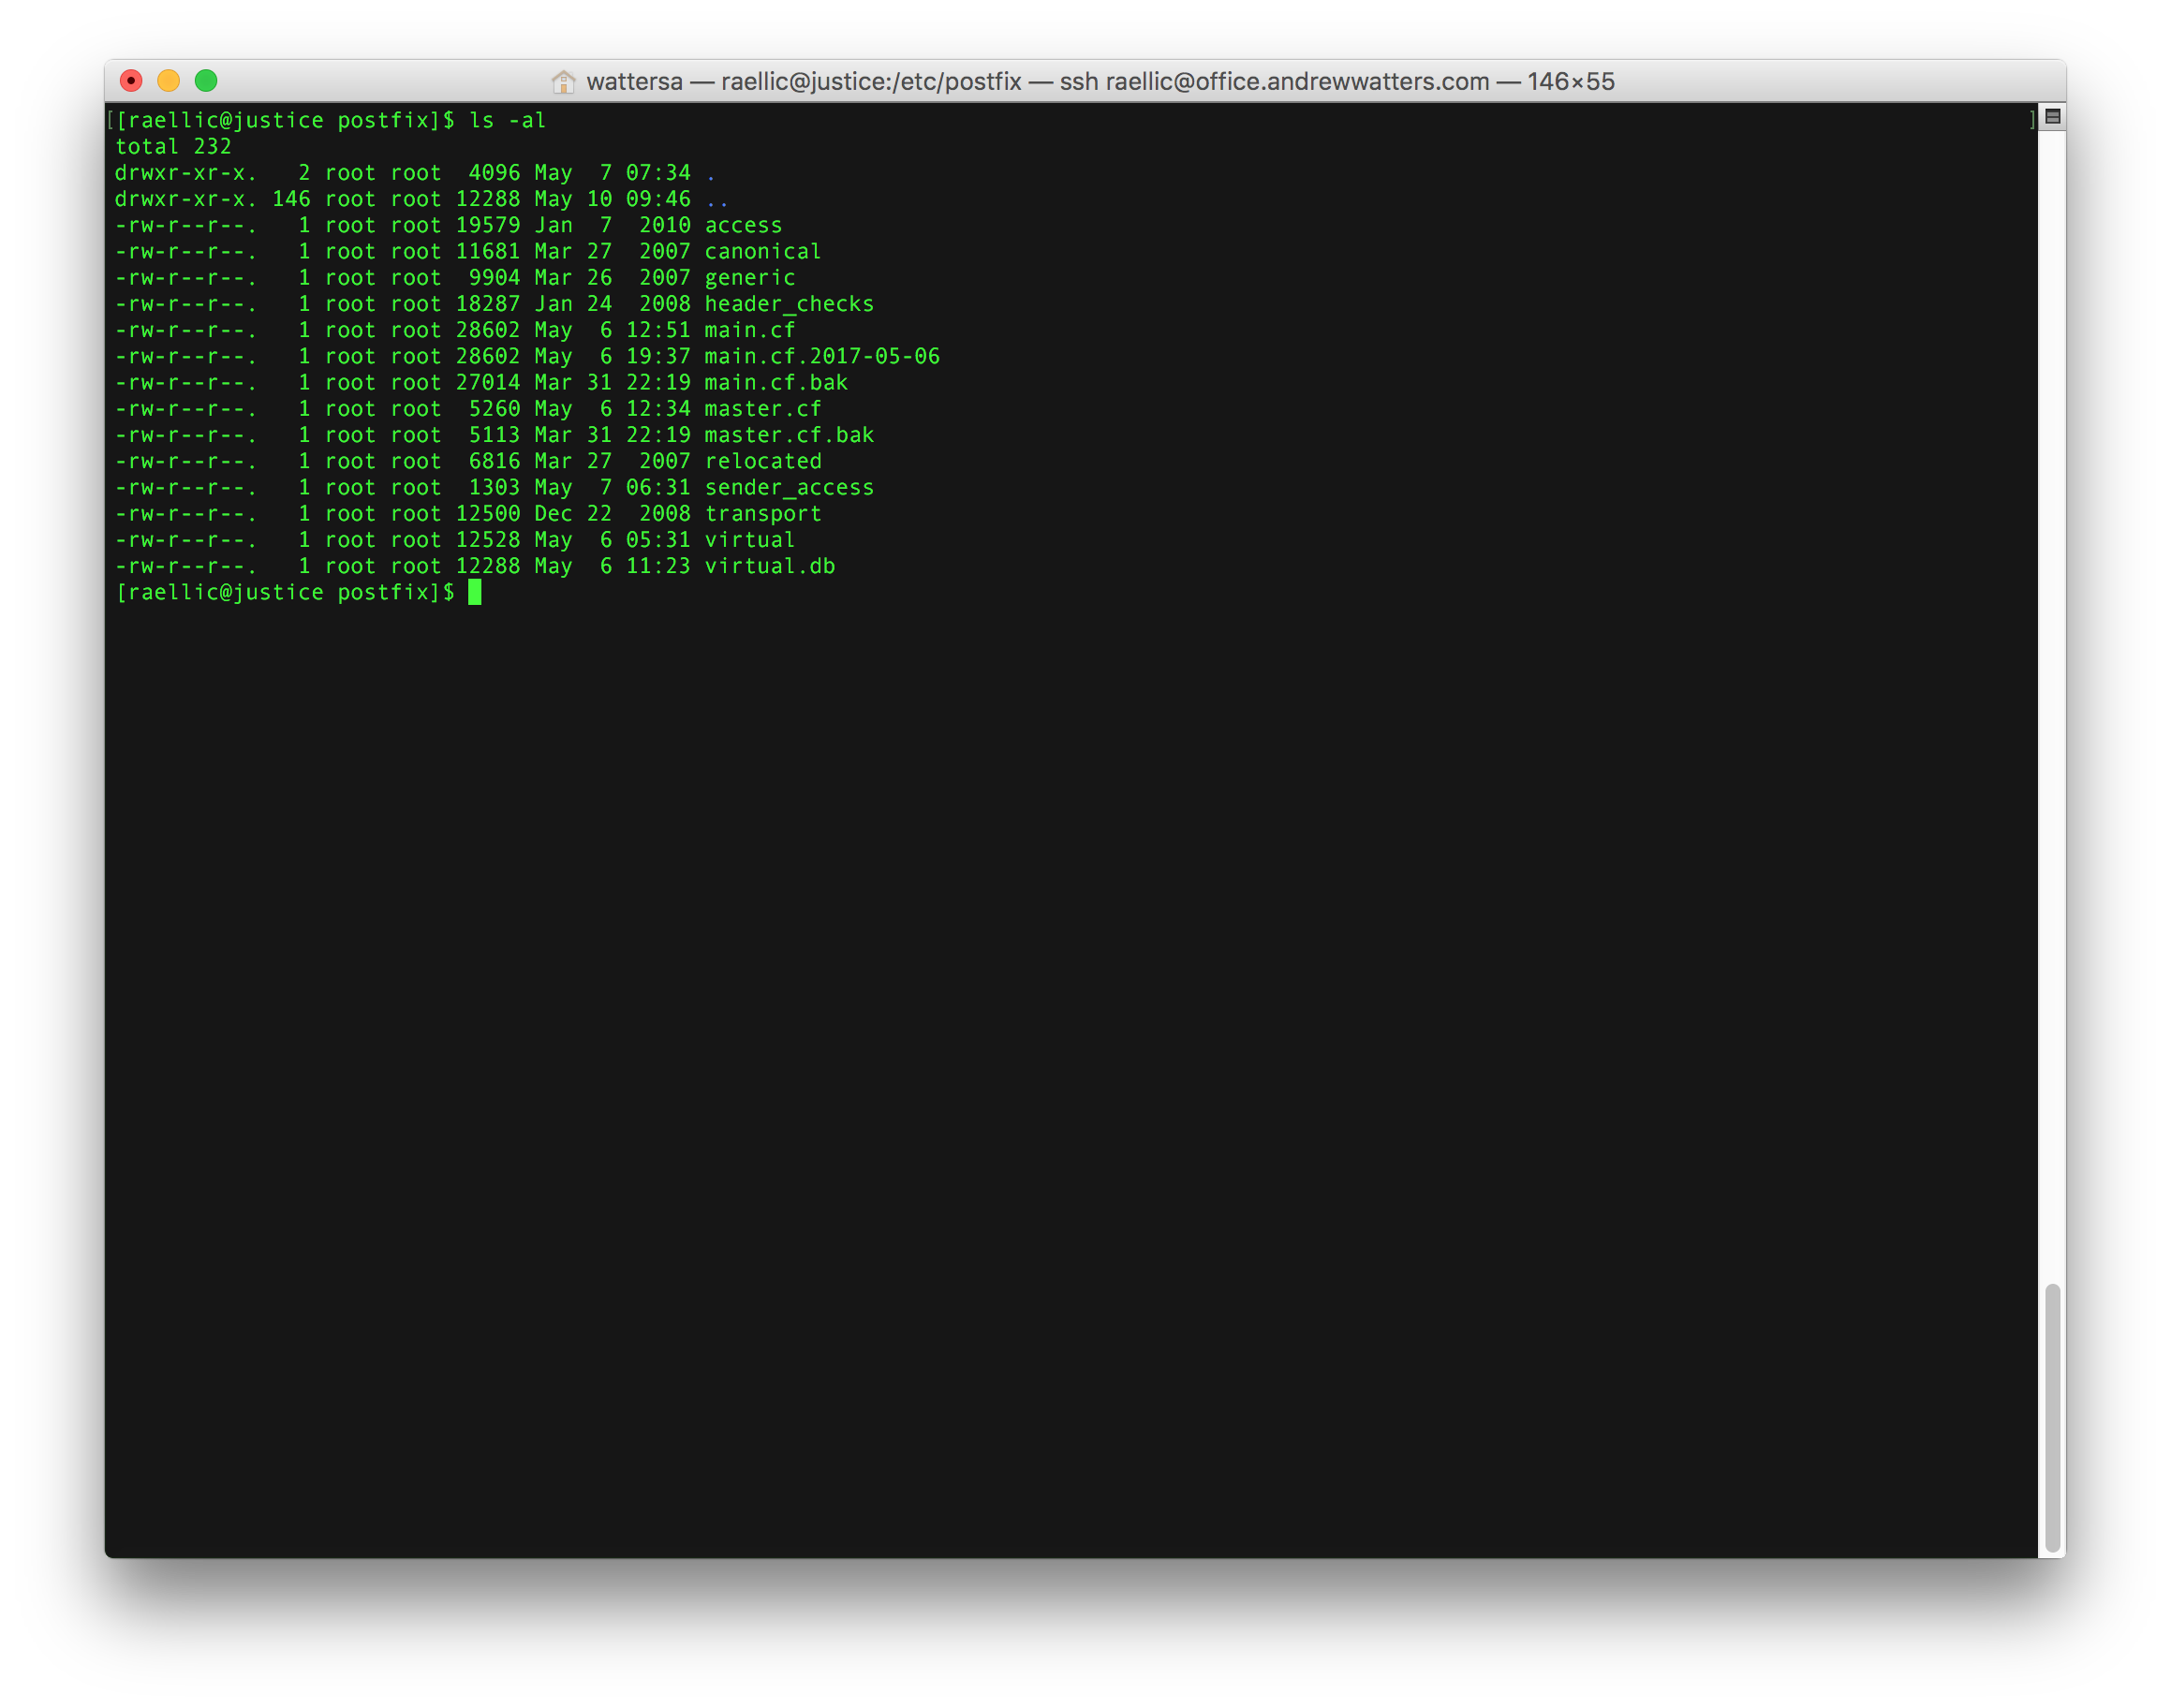
The most important configuration file is /etc/postfix/main.cf. Here is what the custom portion of mine looks like: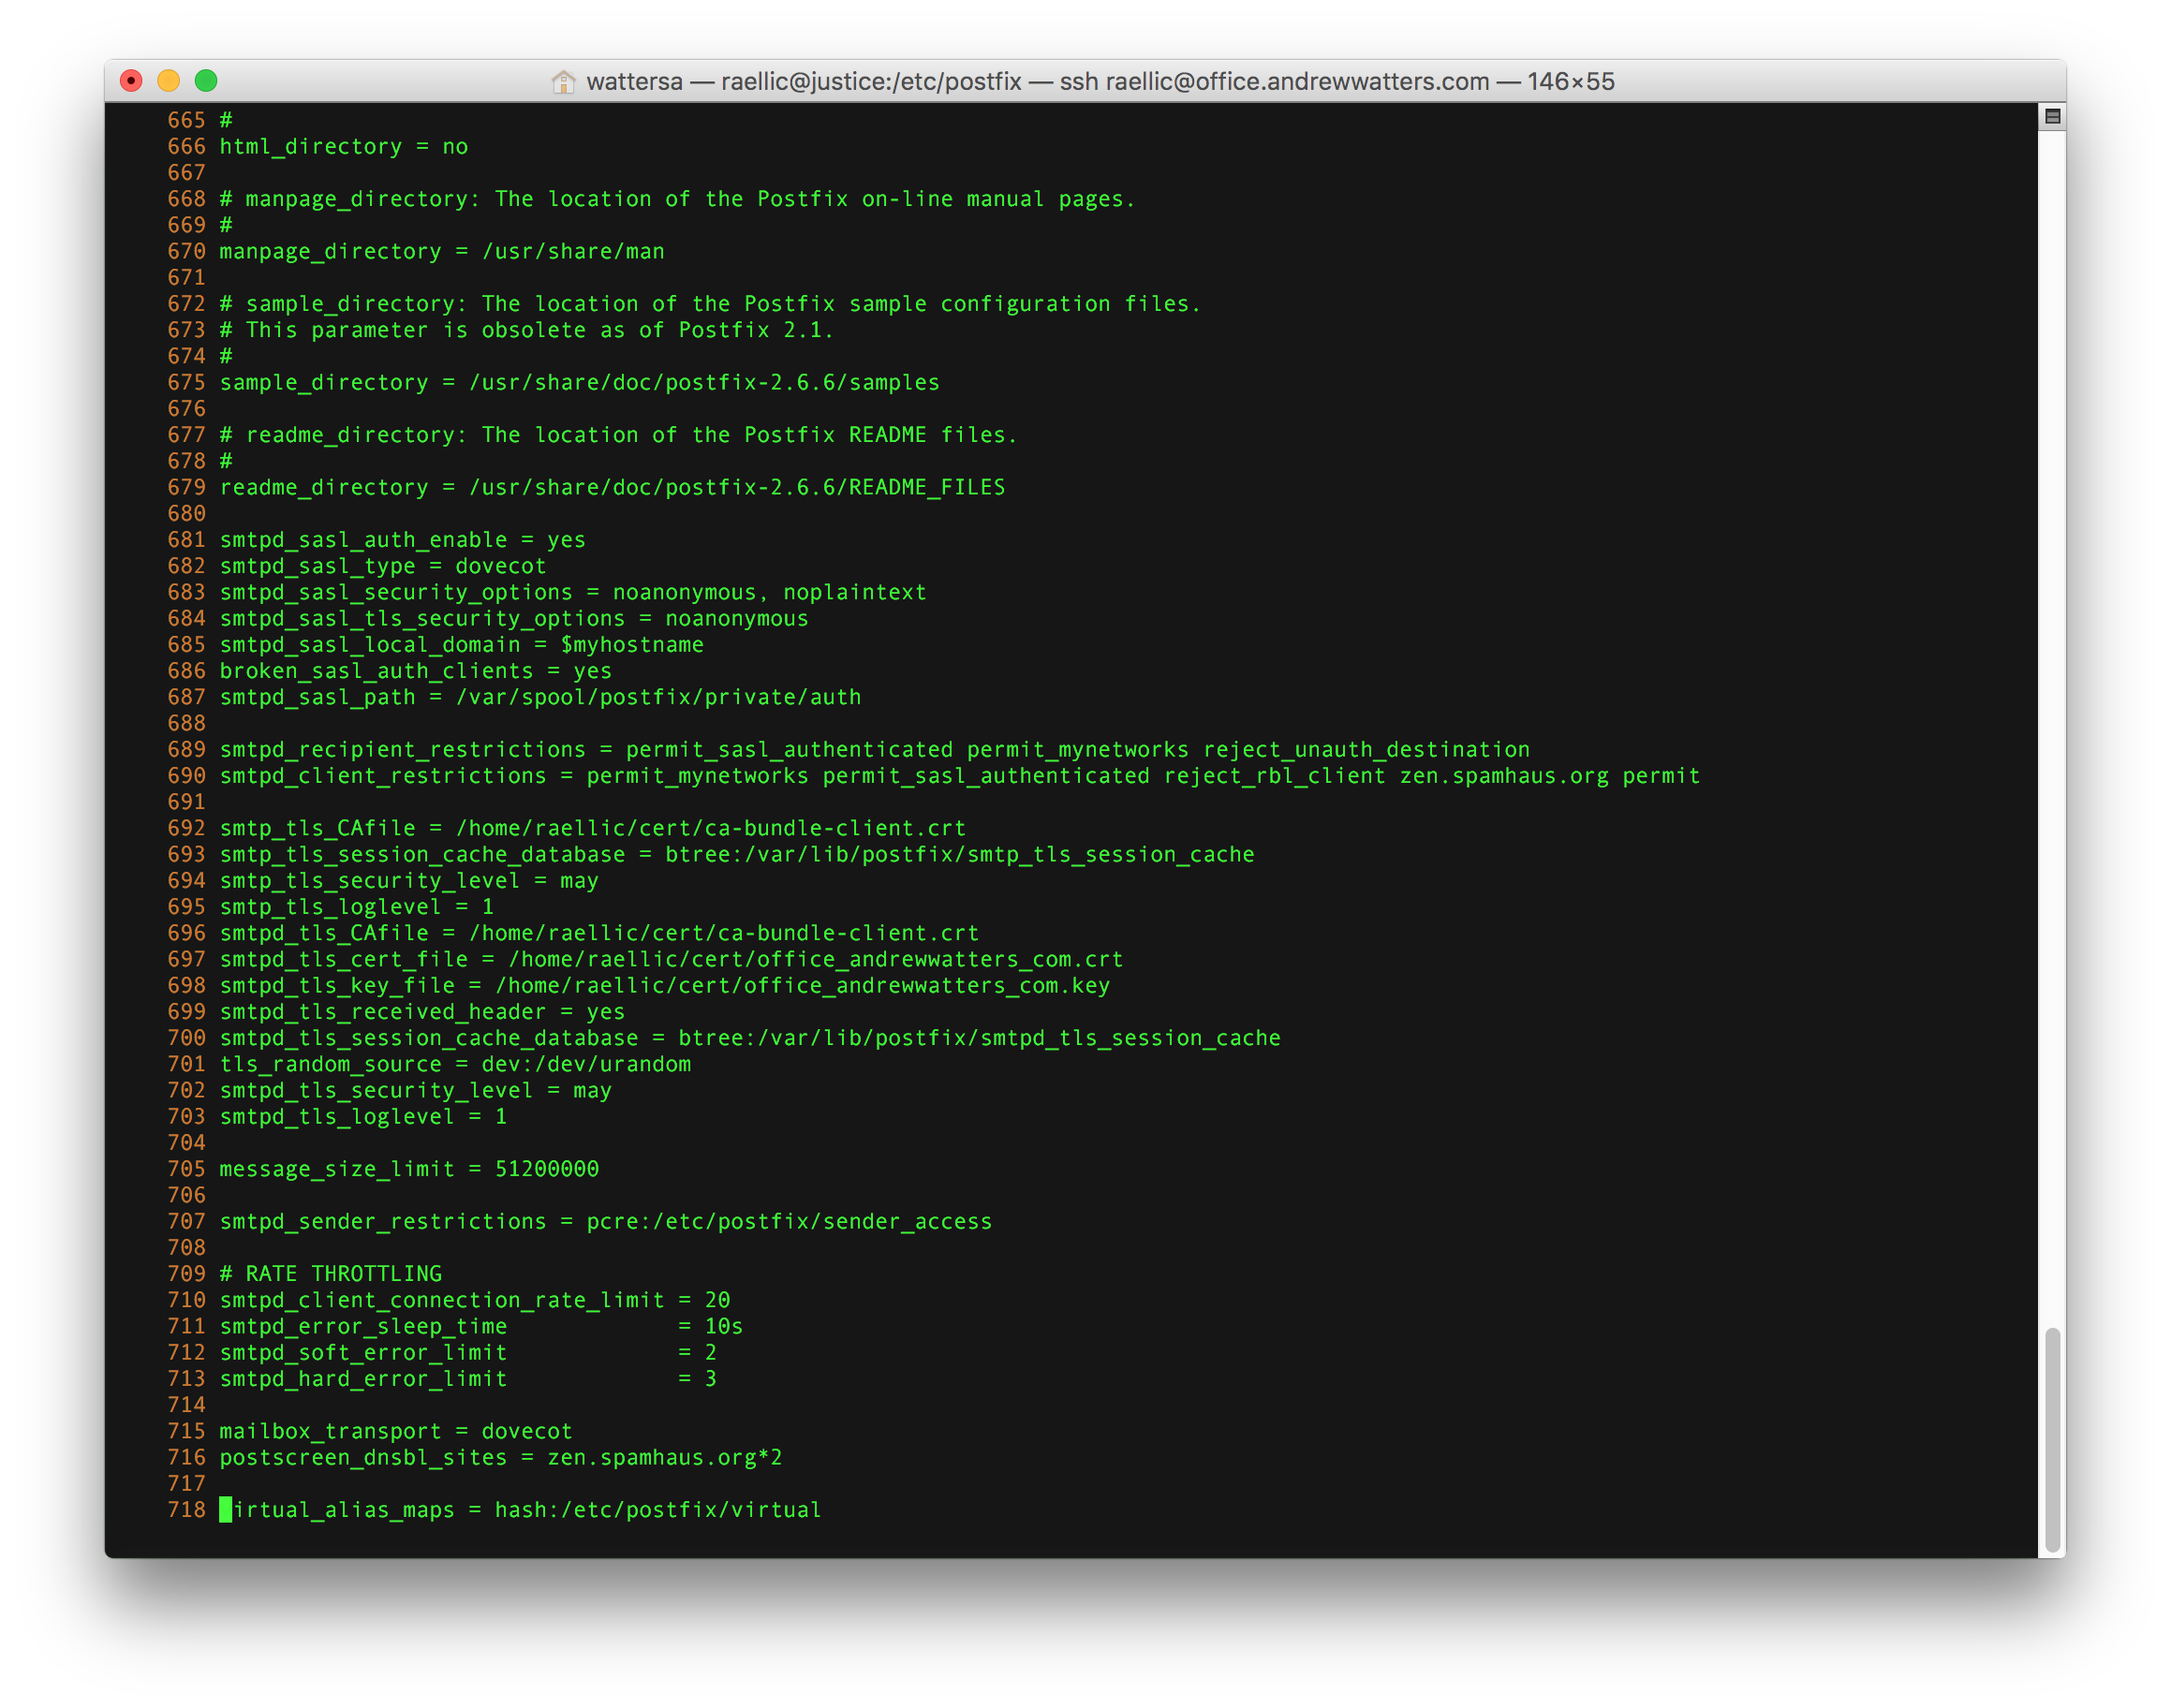
I'll discuss each option in turn.
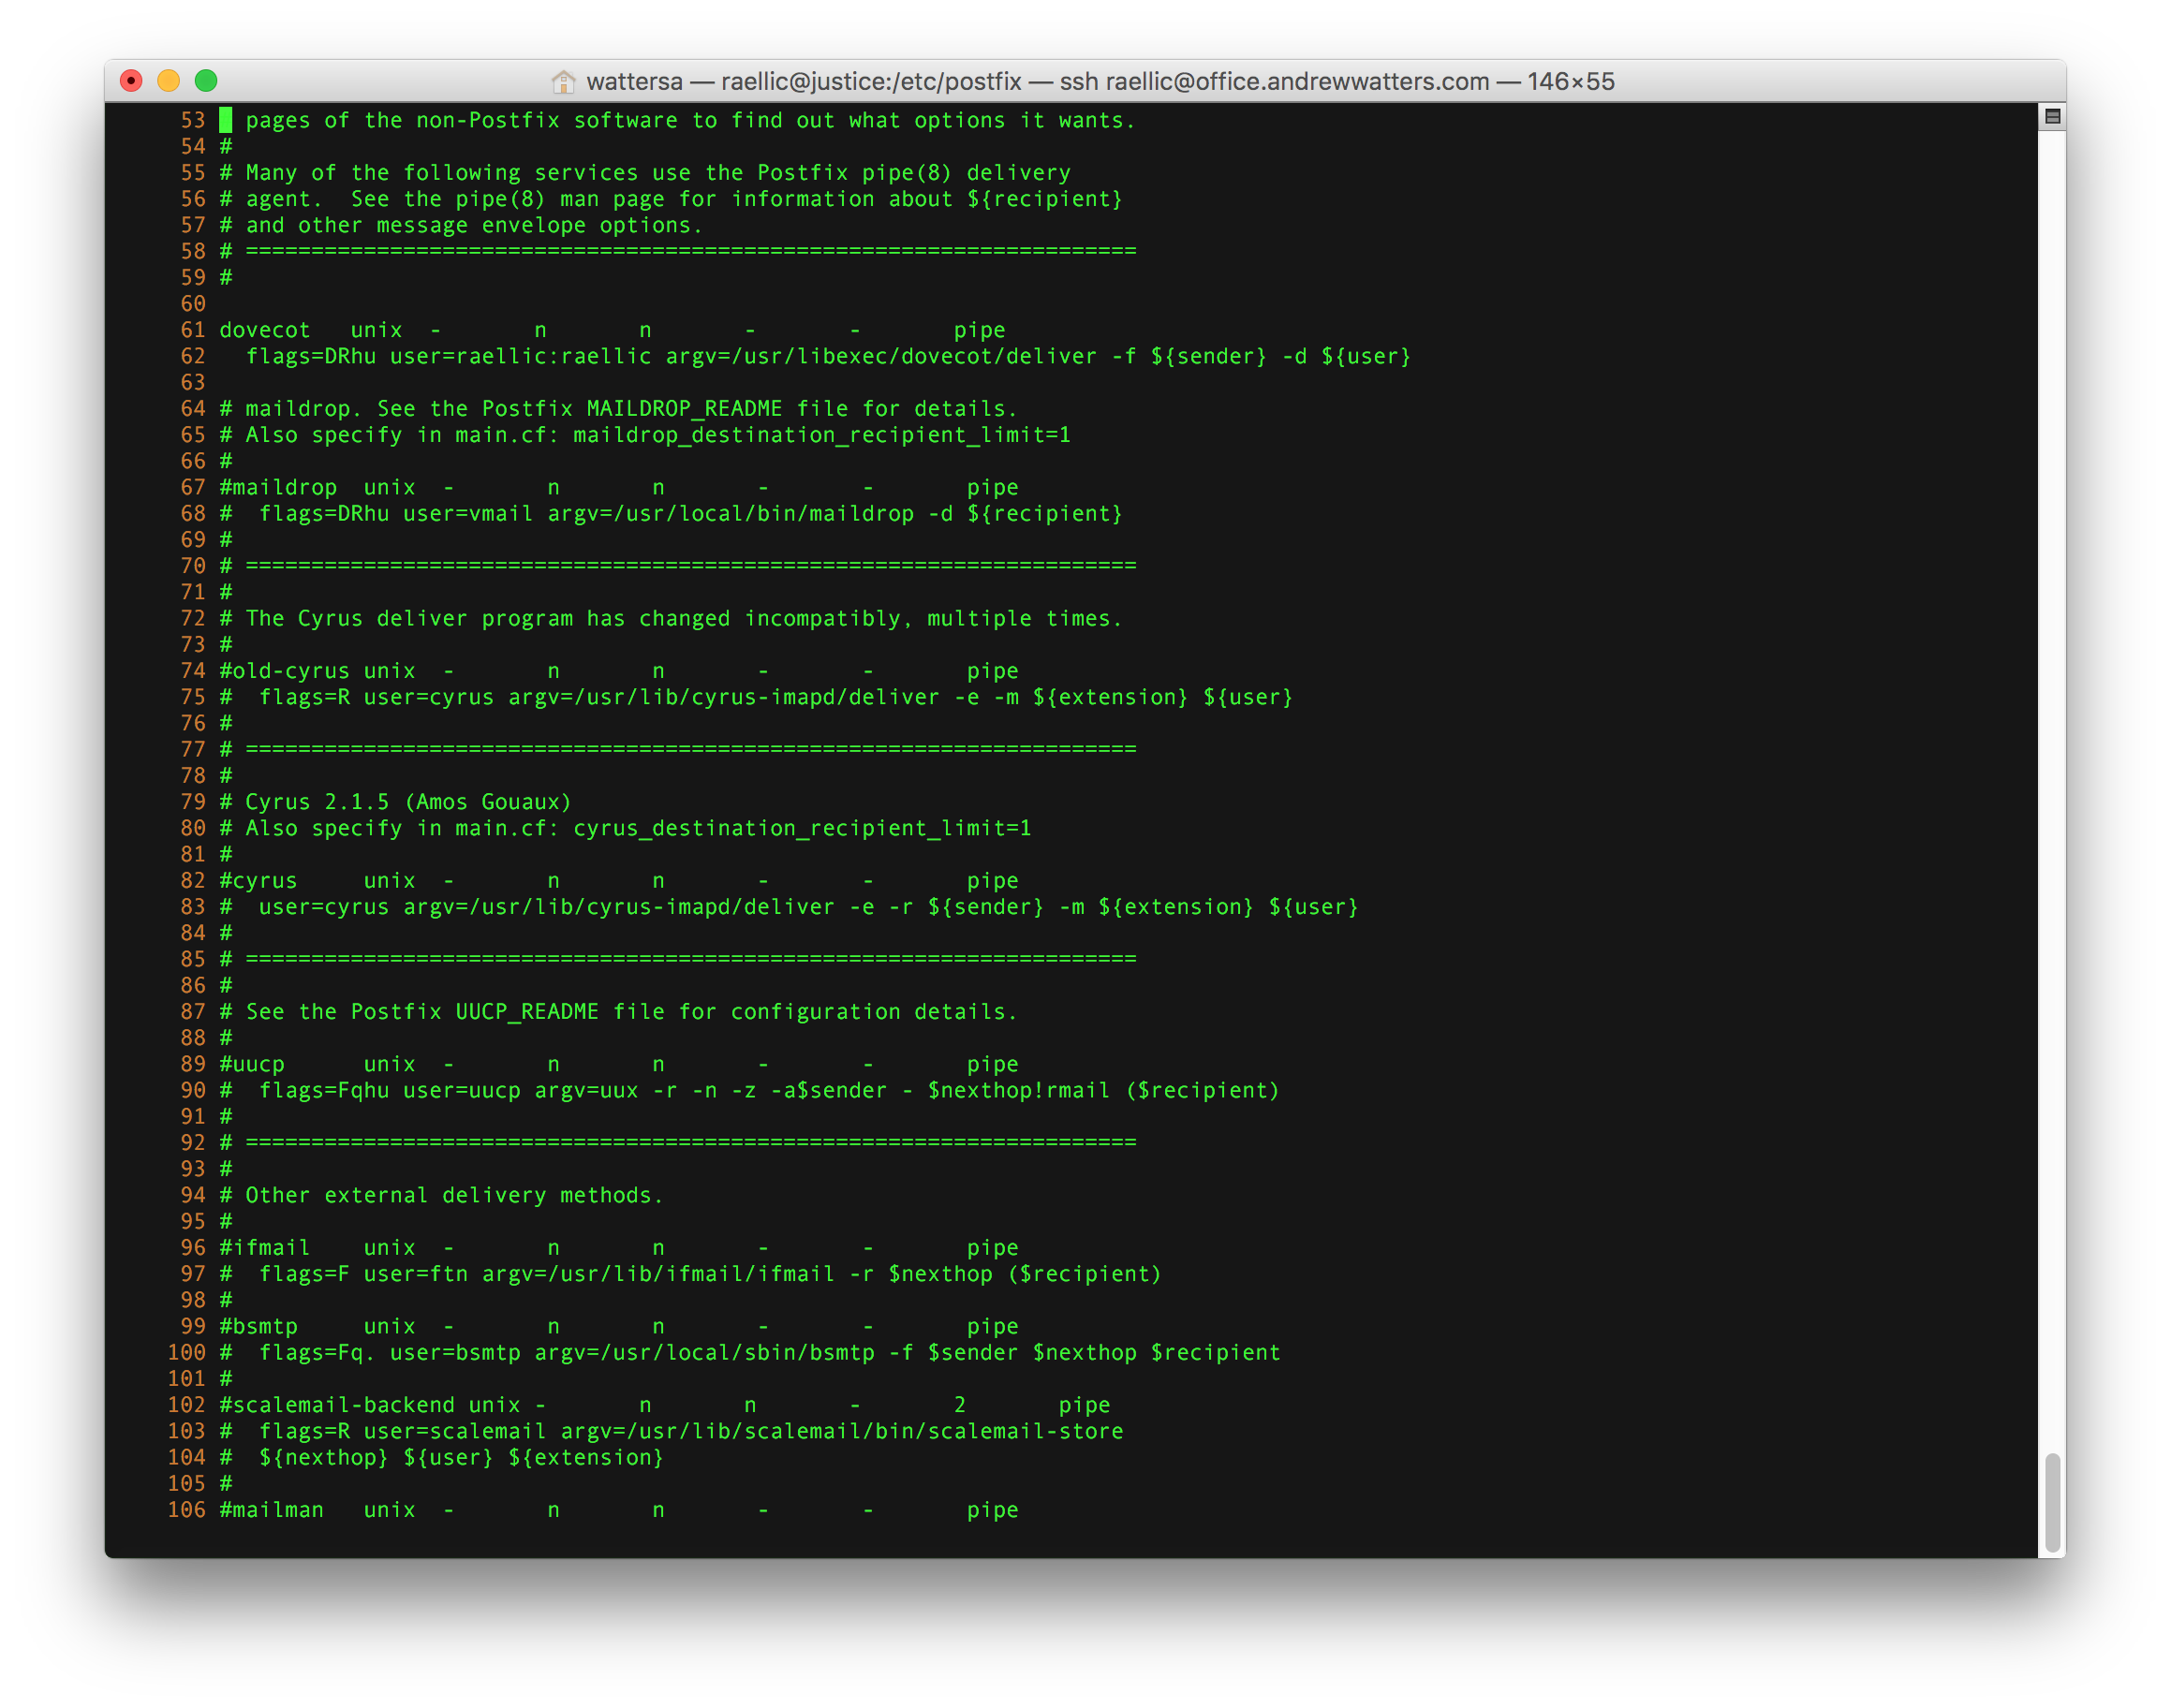
The Dovecot interface is found in /etc/postfix/master.cf
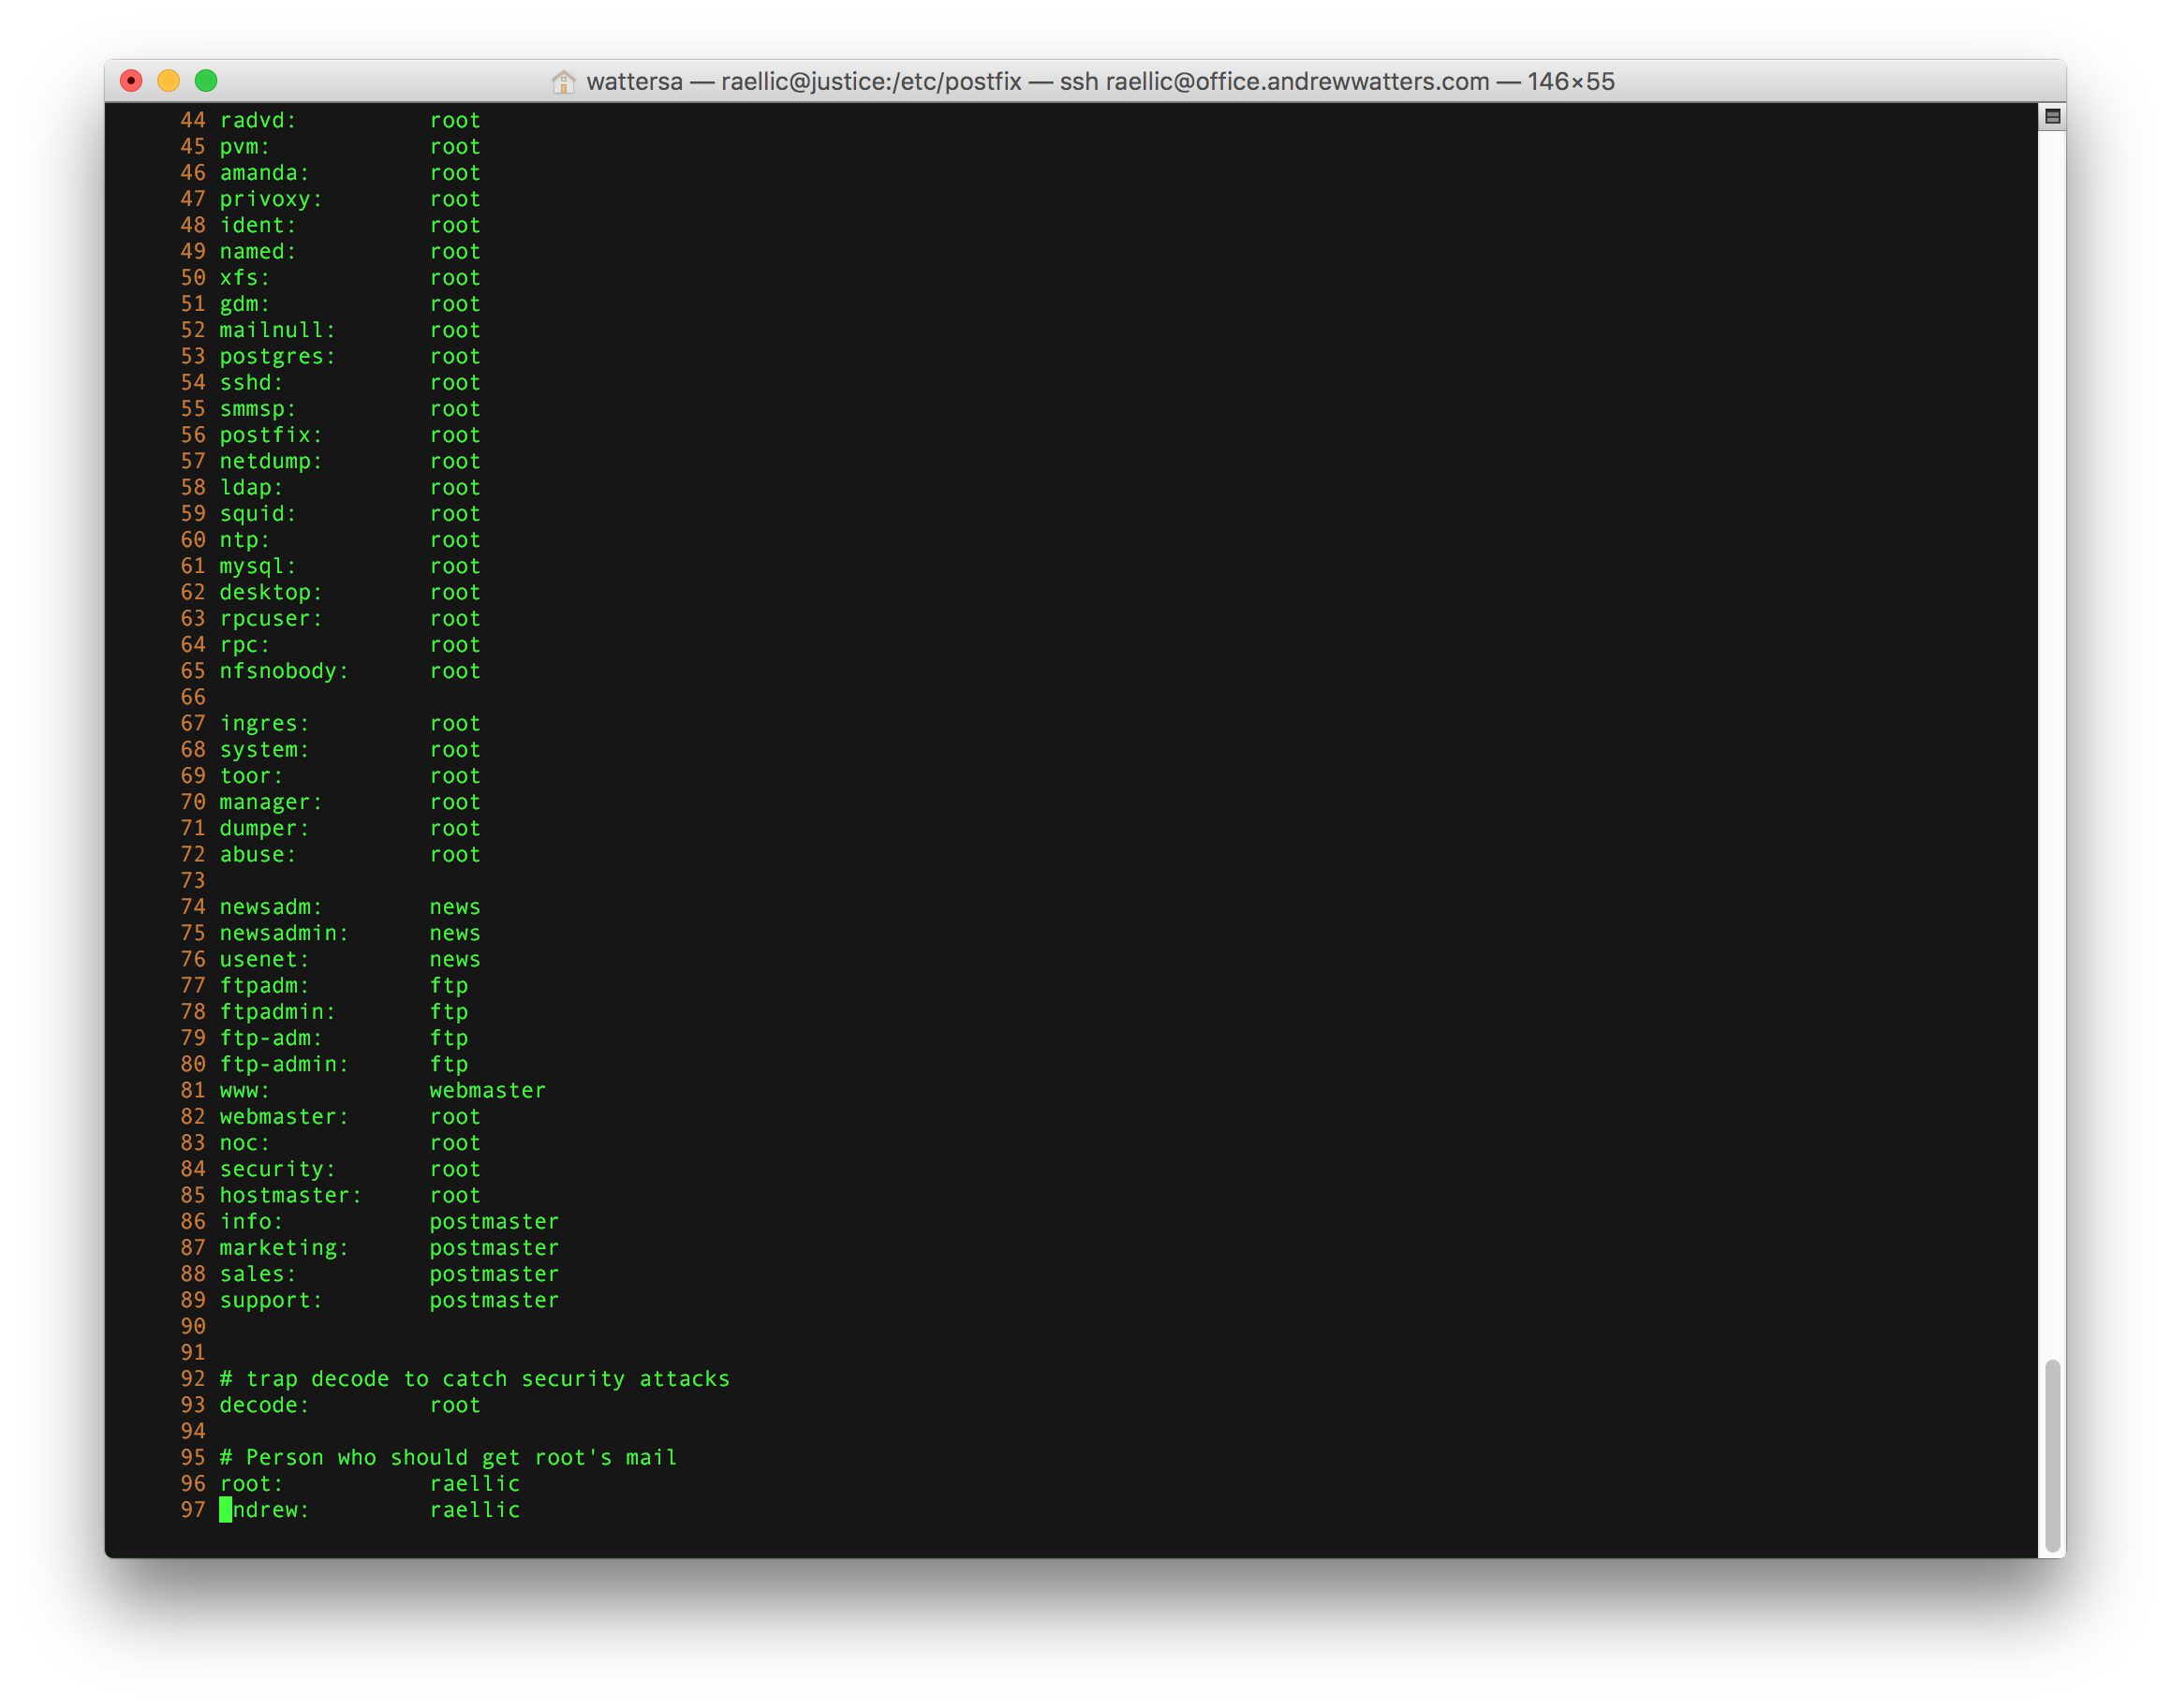
The virtual address mappings are found in /etc/postfix/virtual and the PAM authentication aliases are in /etc/aliases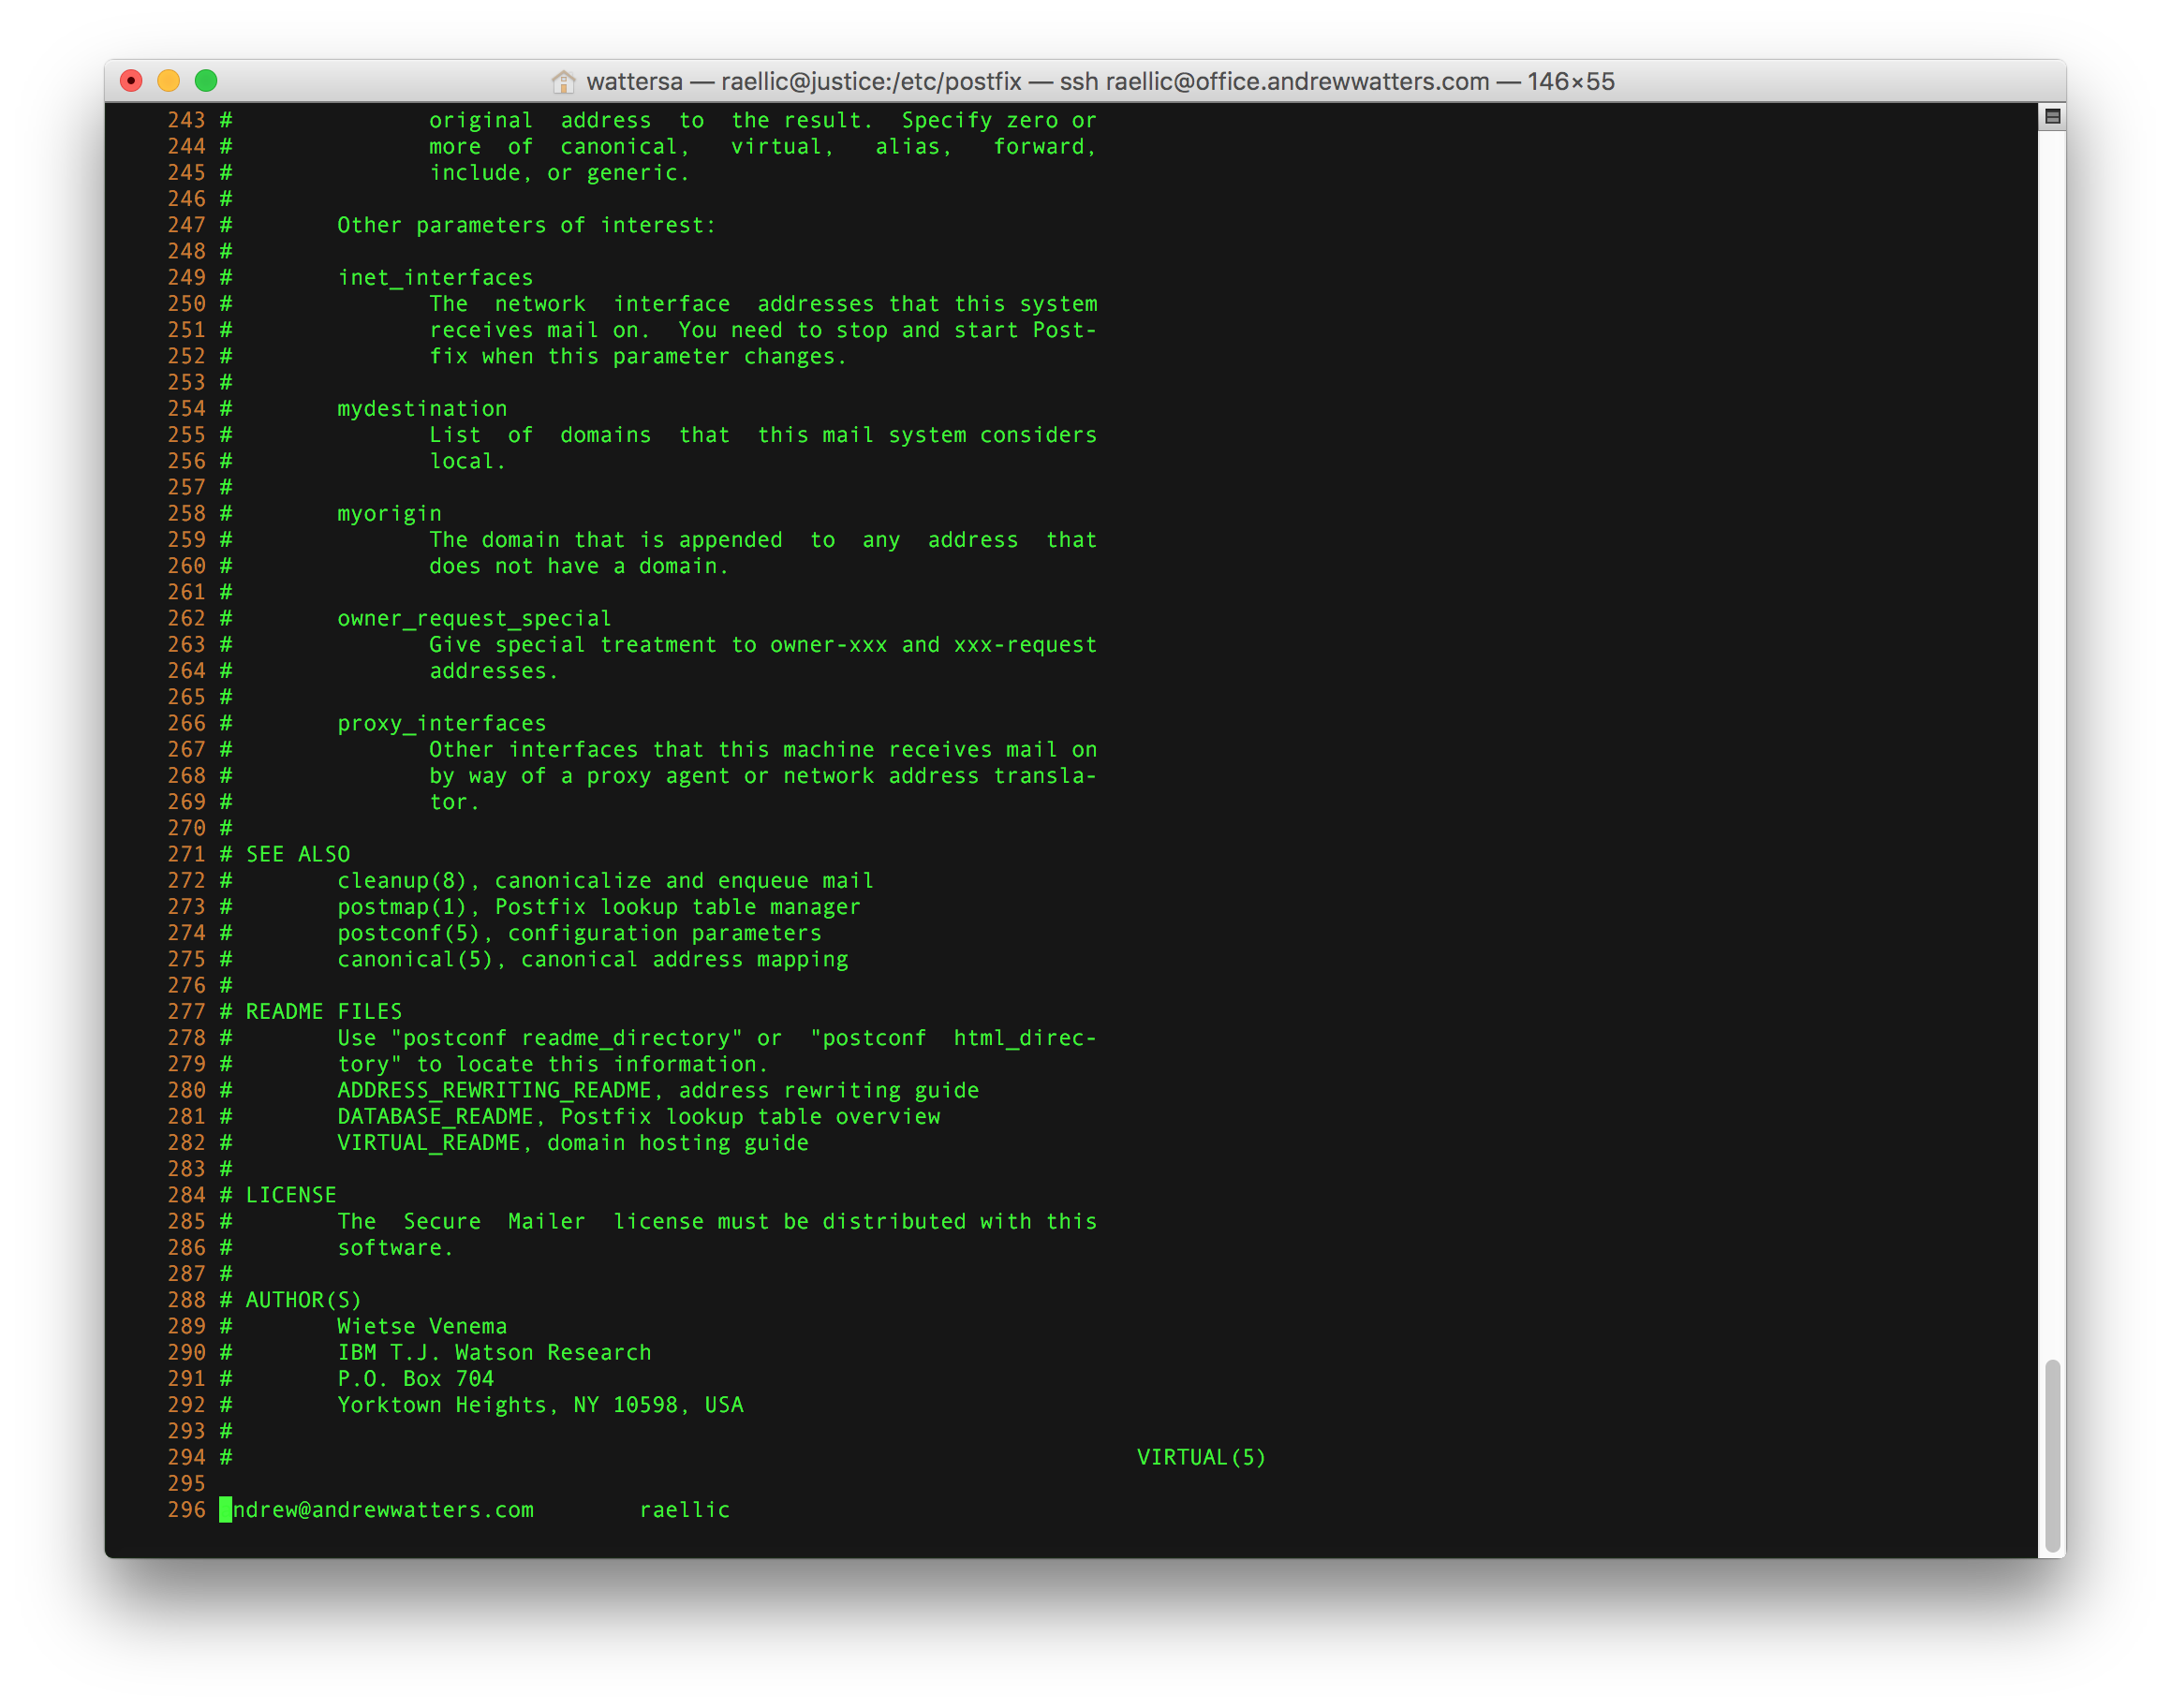
You can restrict any sender you like in sender_access using Perl-compatible regular expressions (note that you must install the Postfix PCRE module first, which is postfix-pcre on RHEL).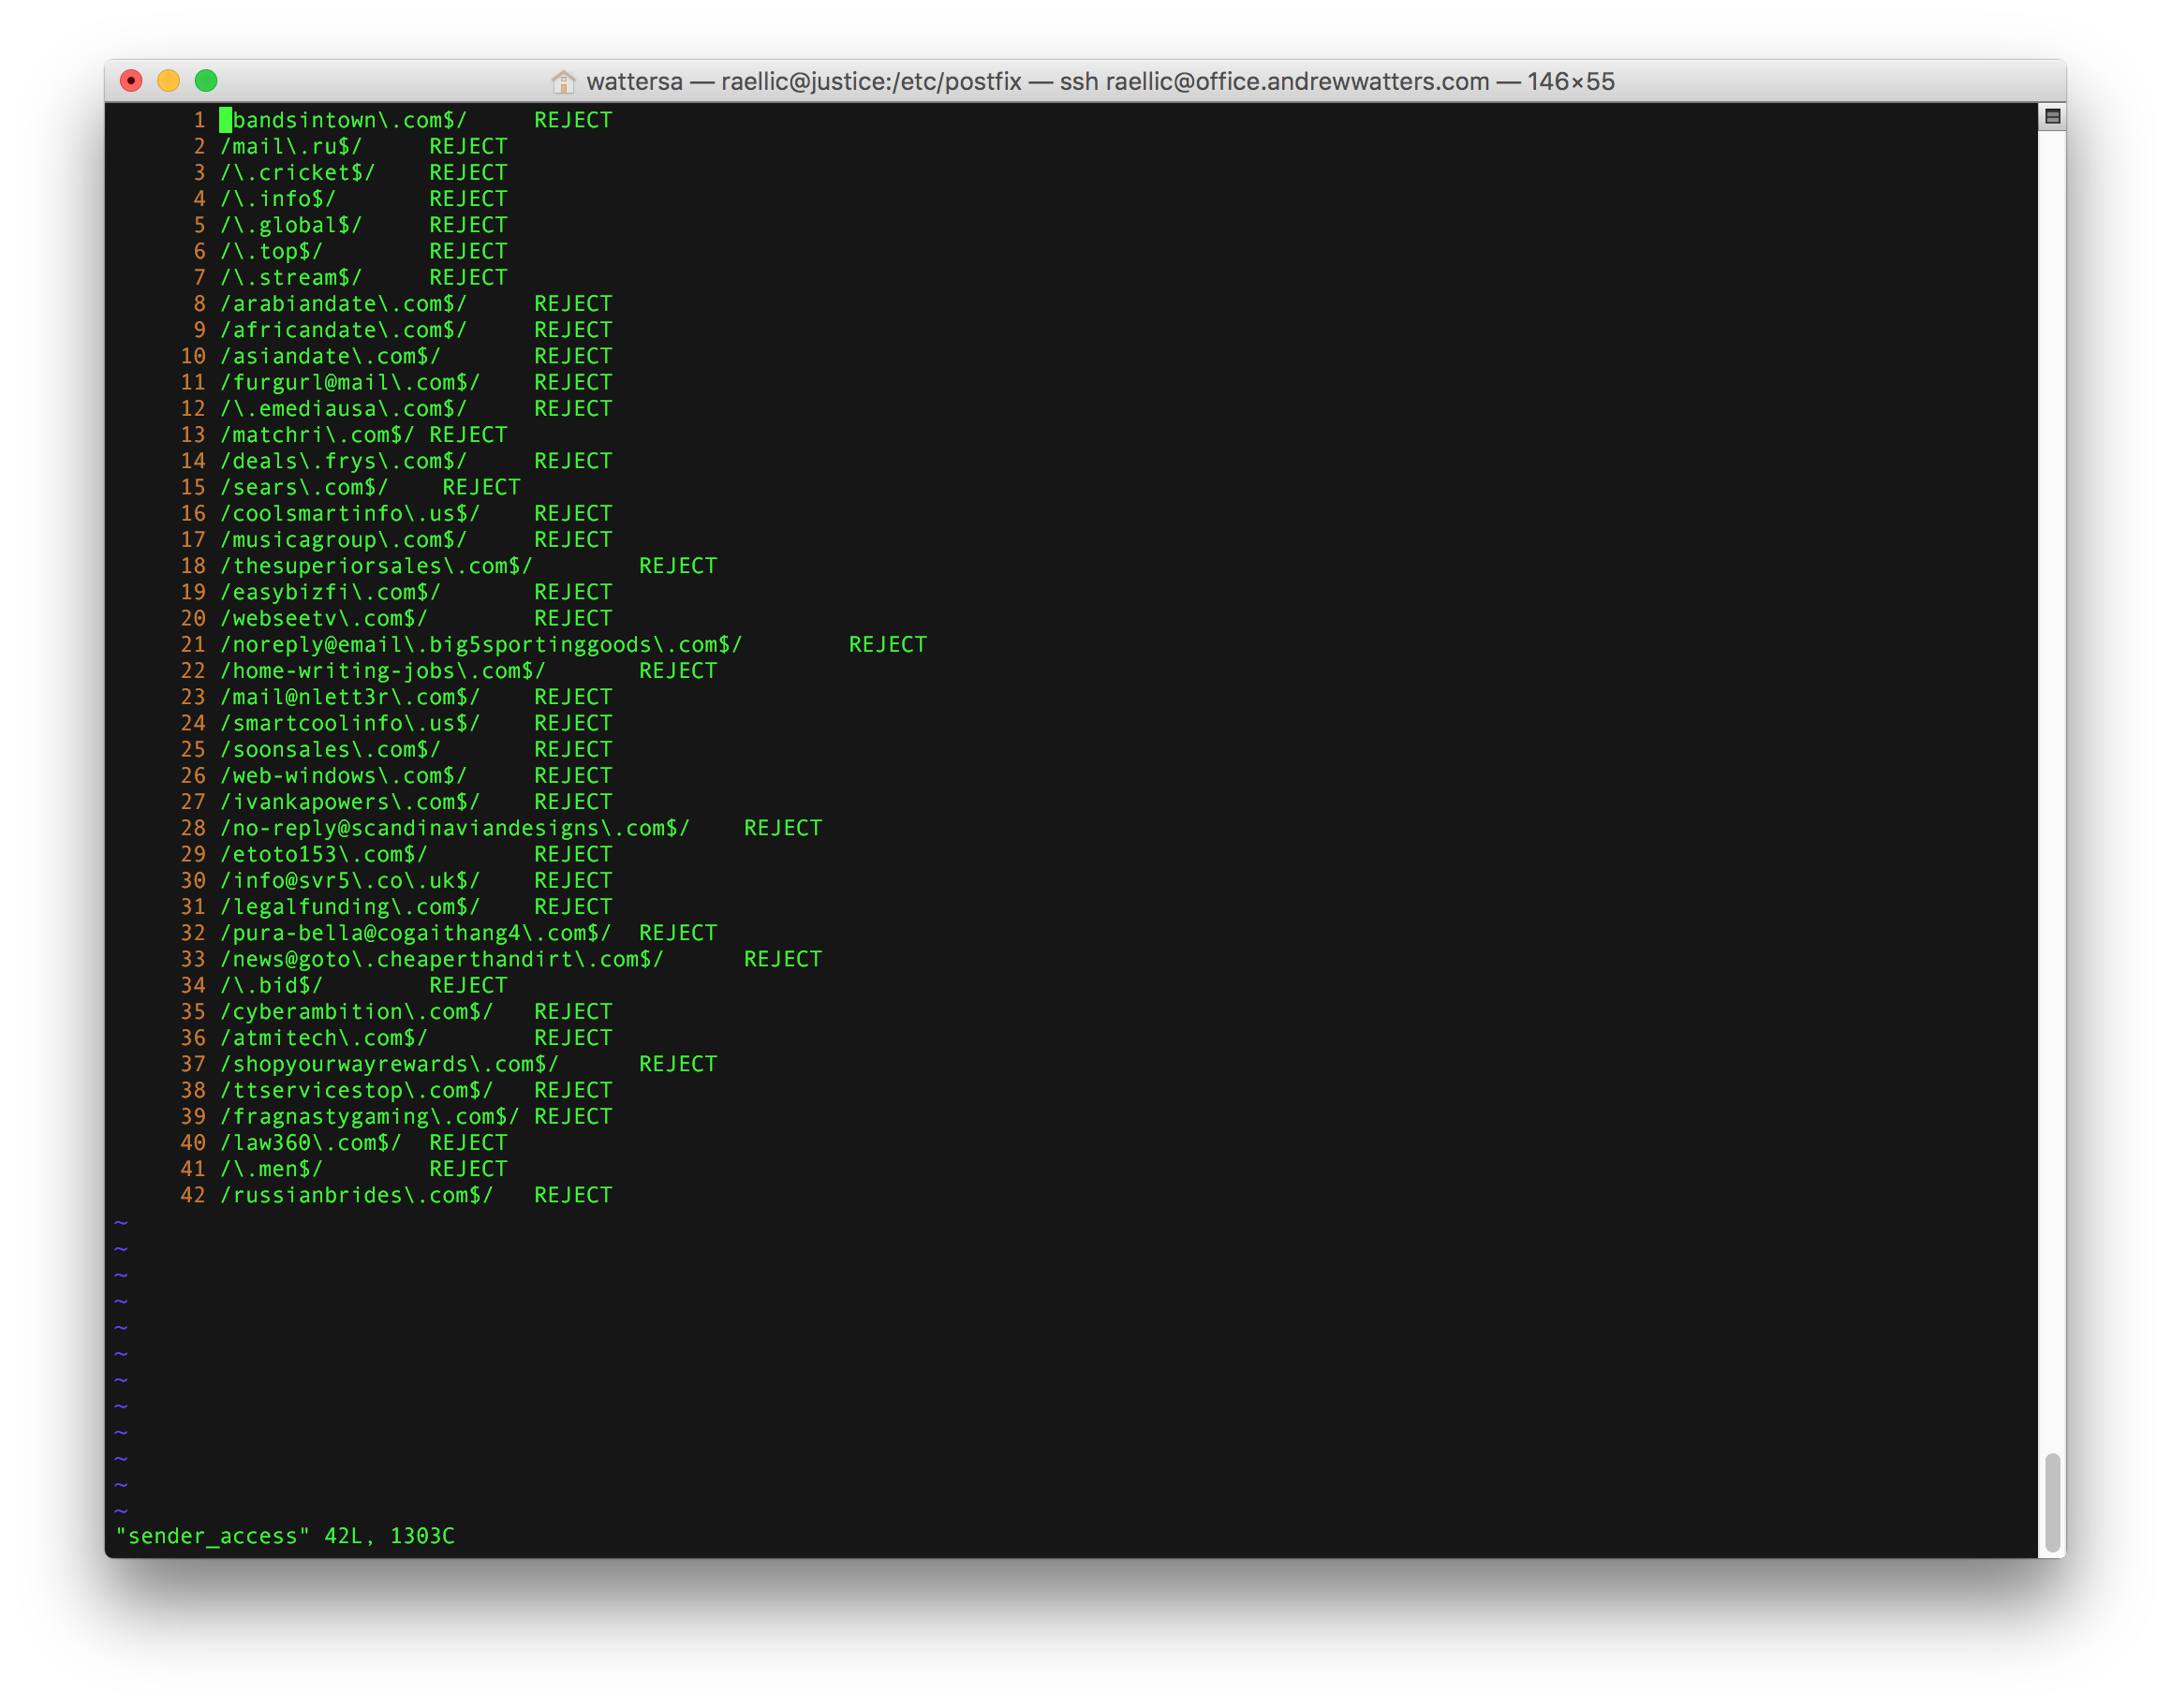
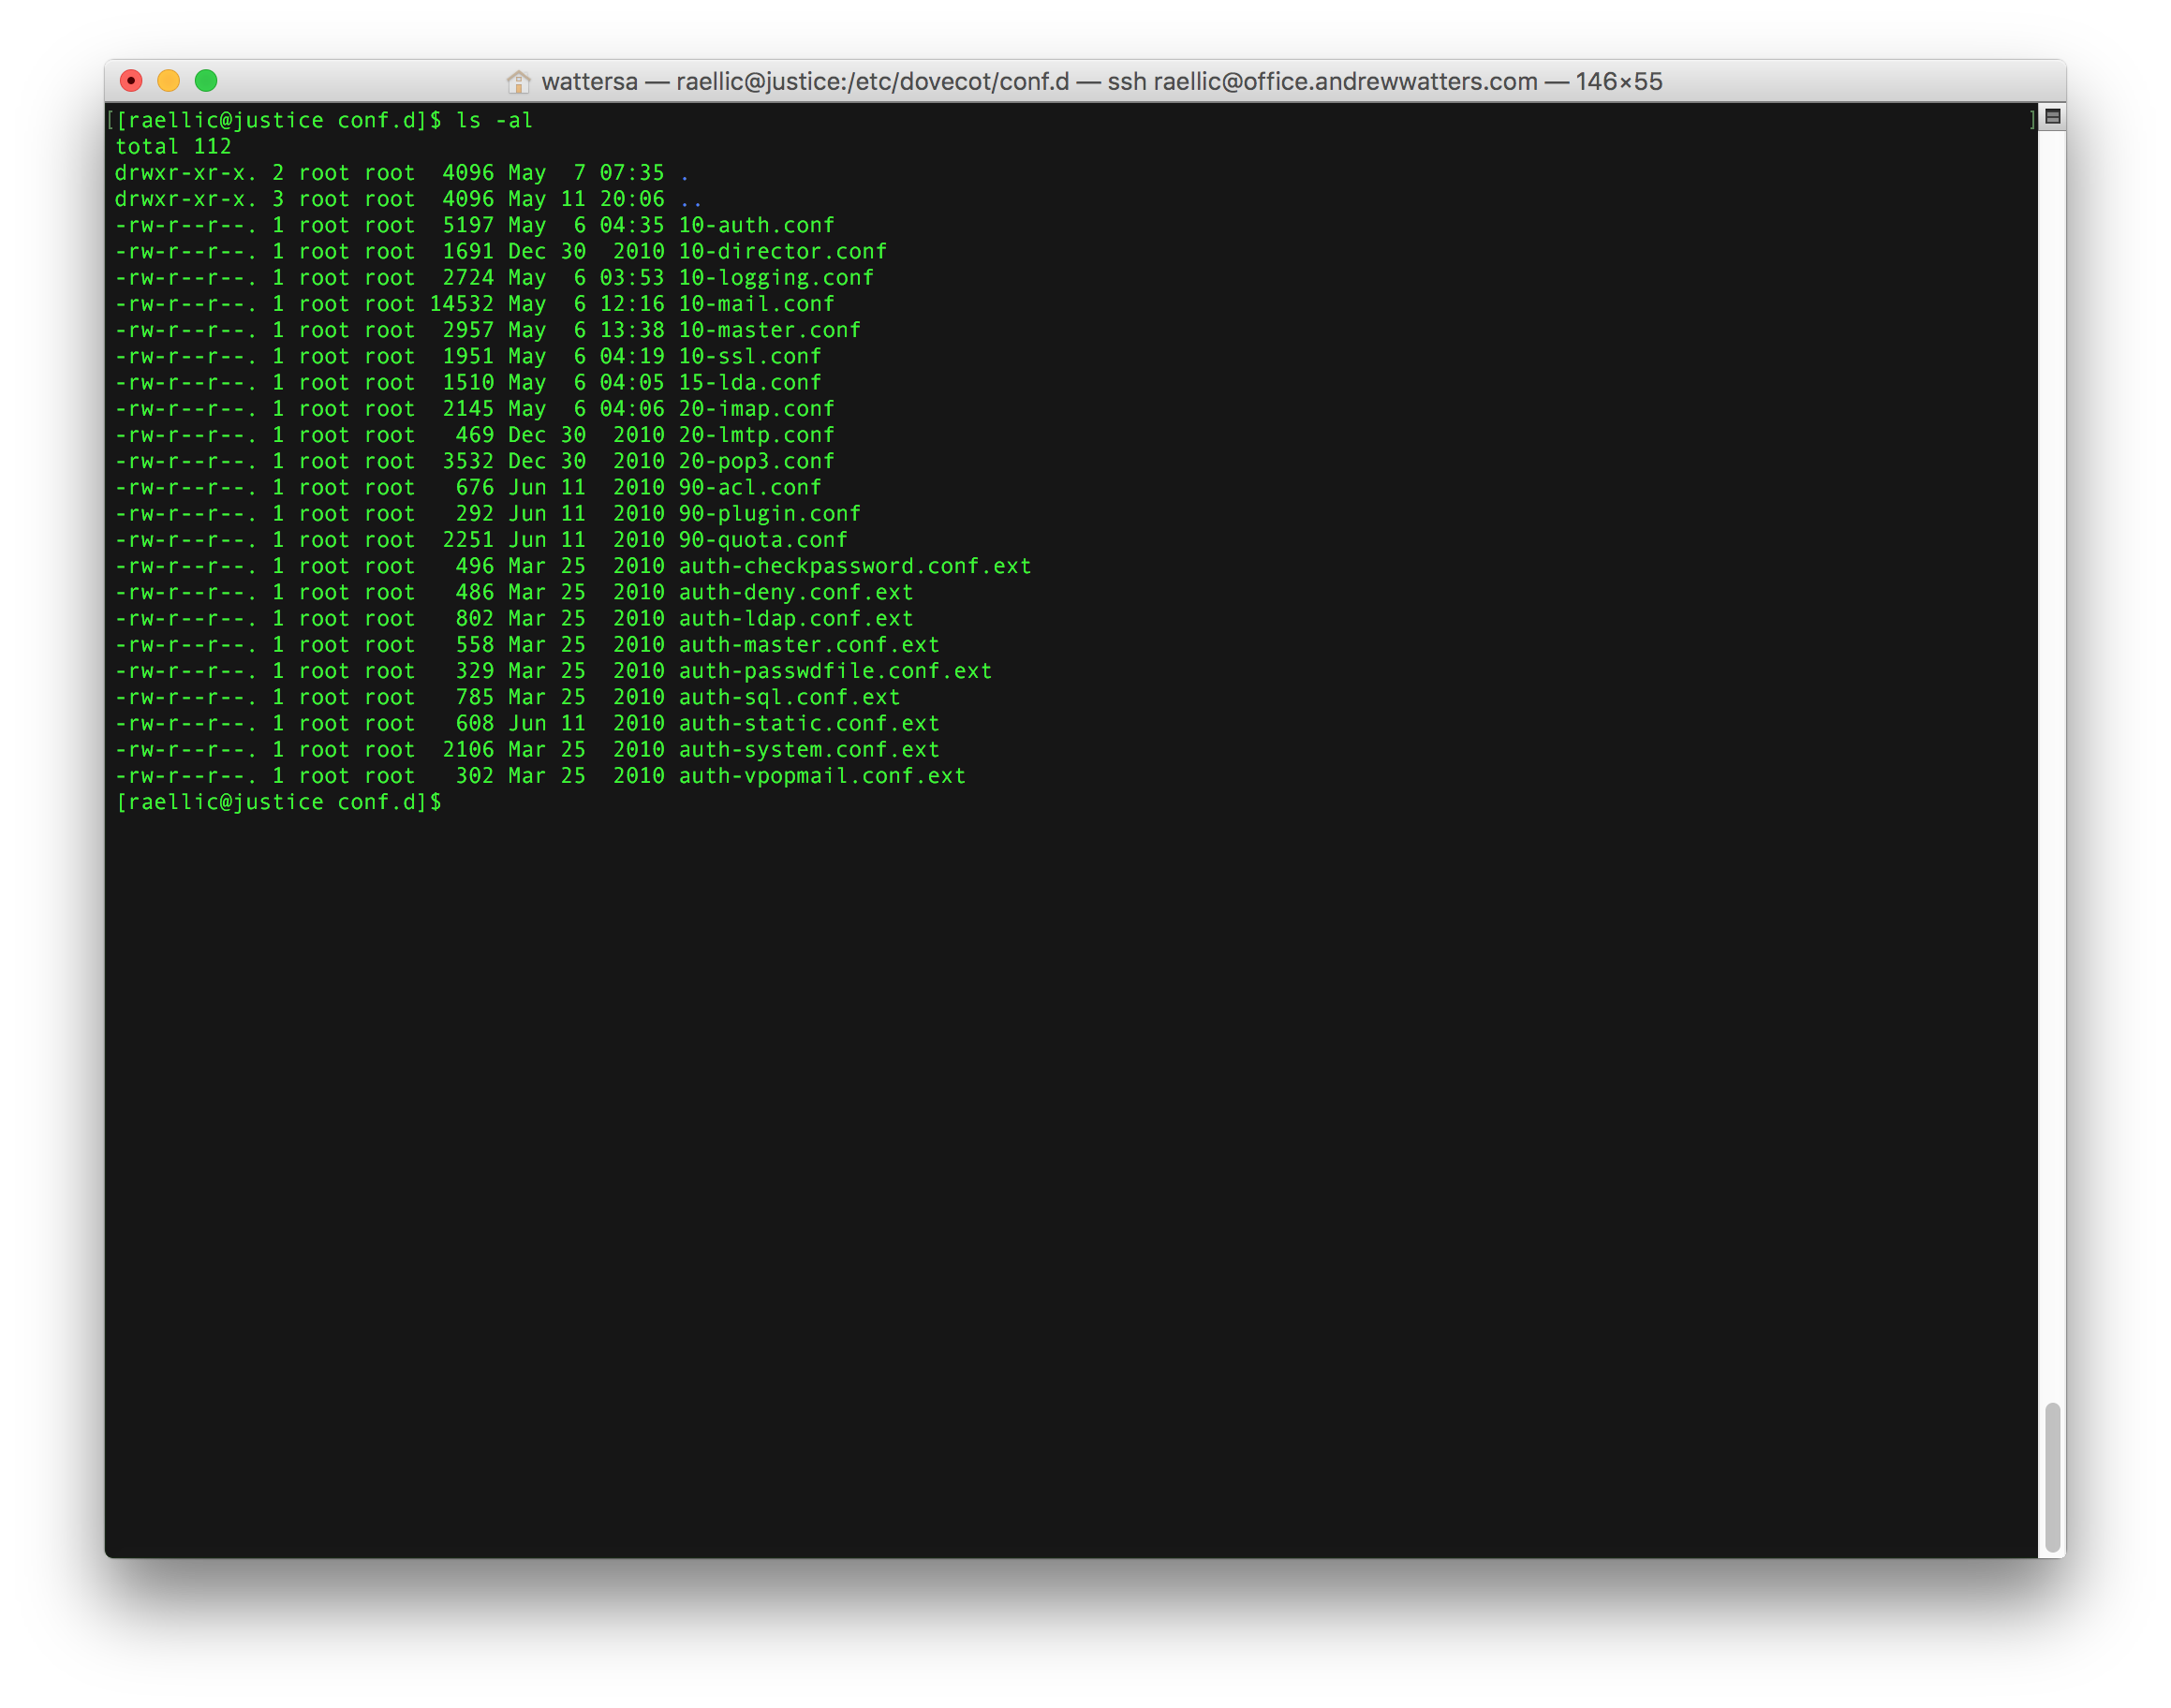
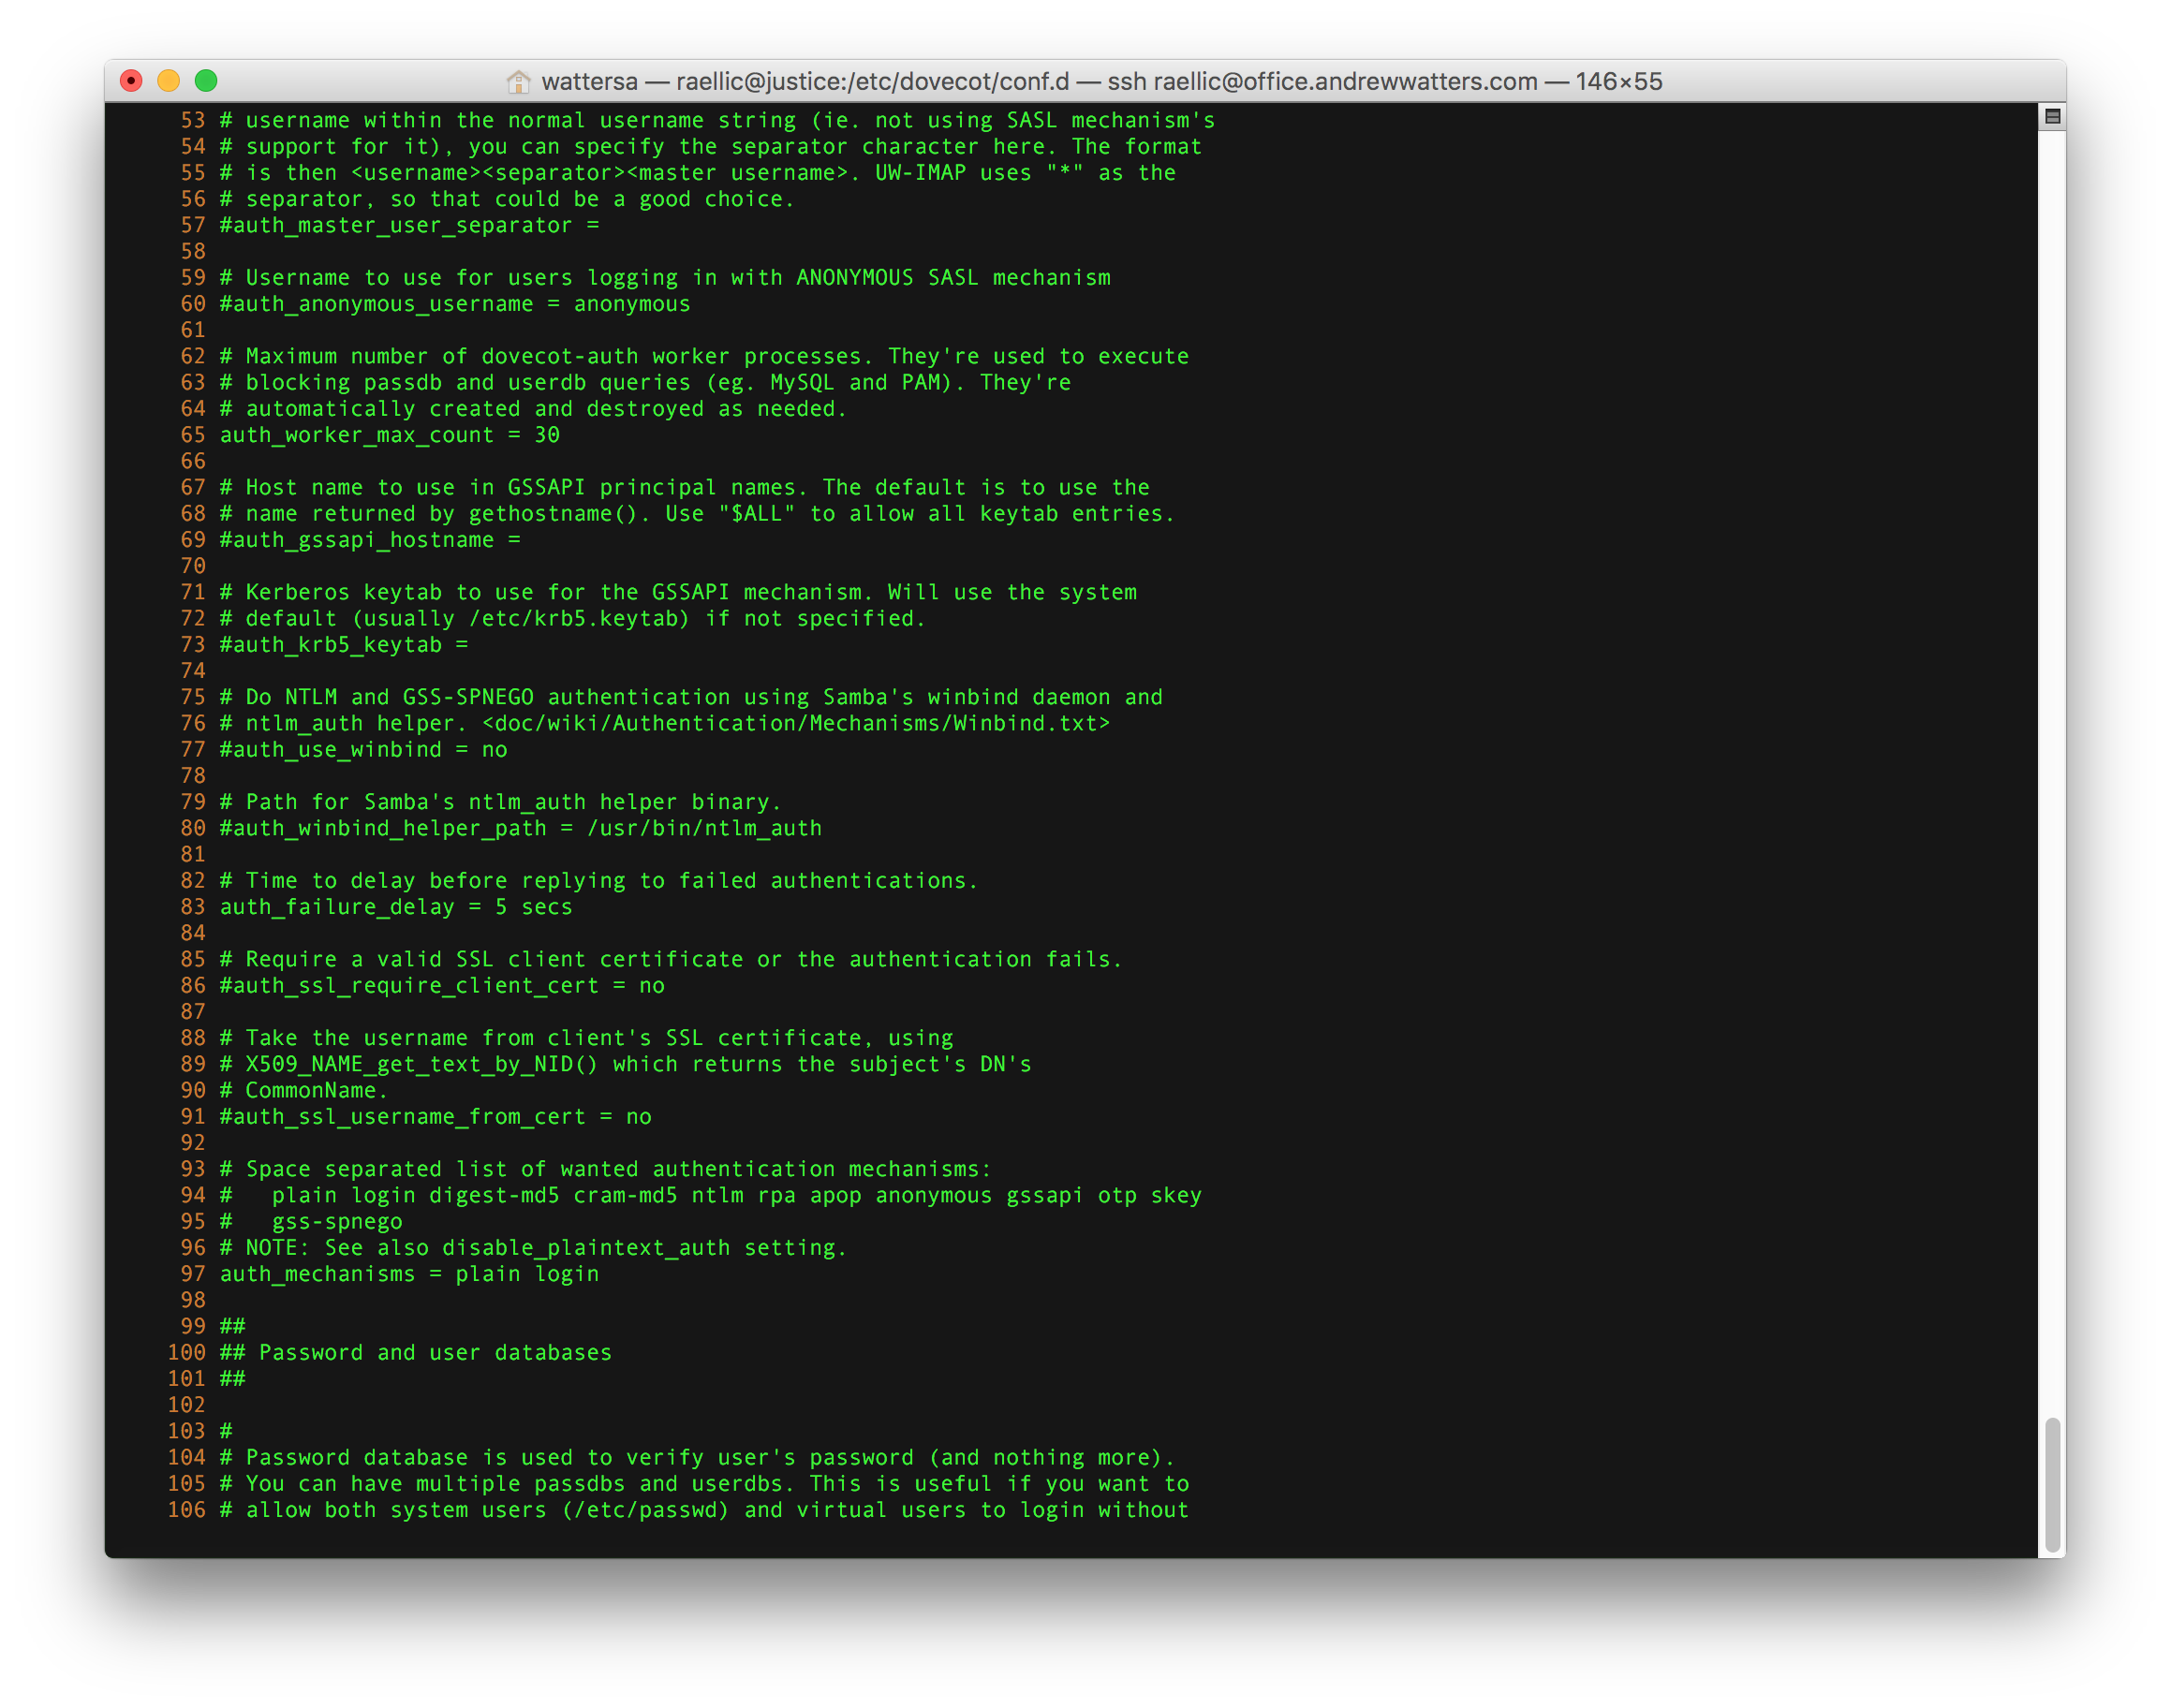
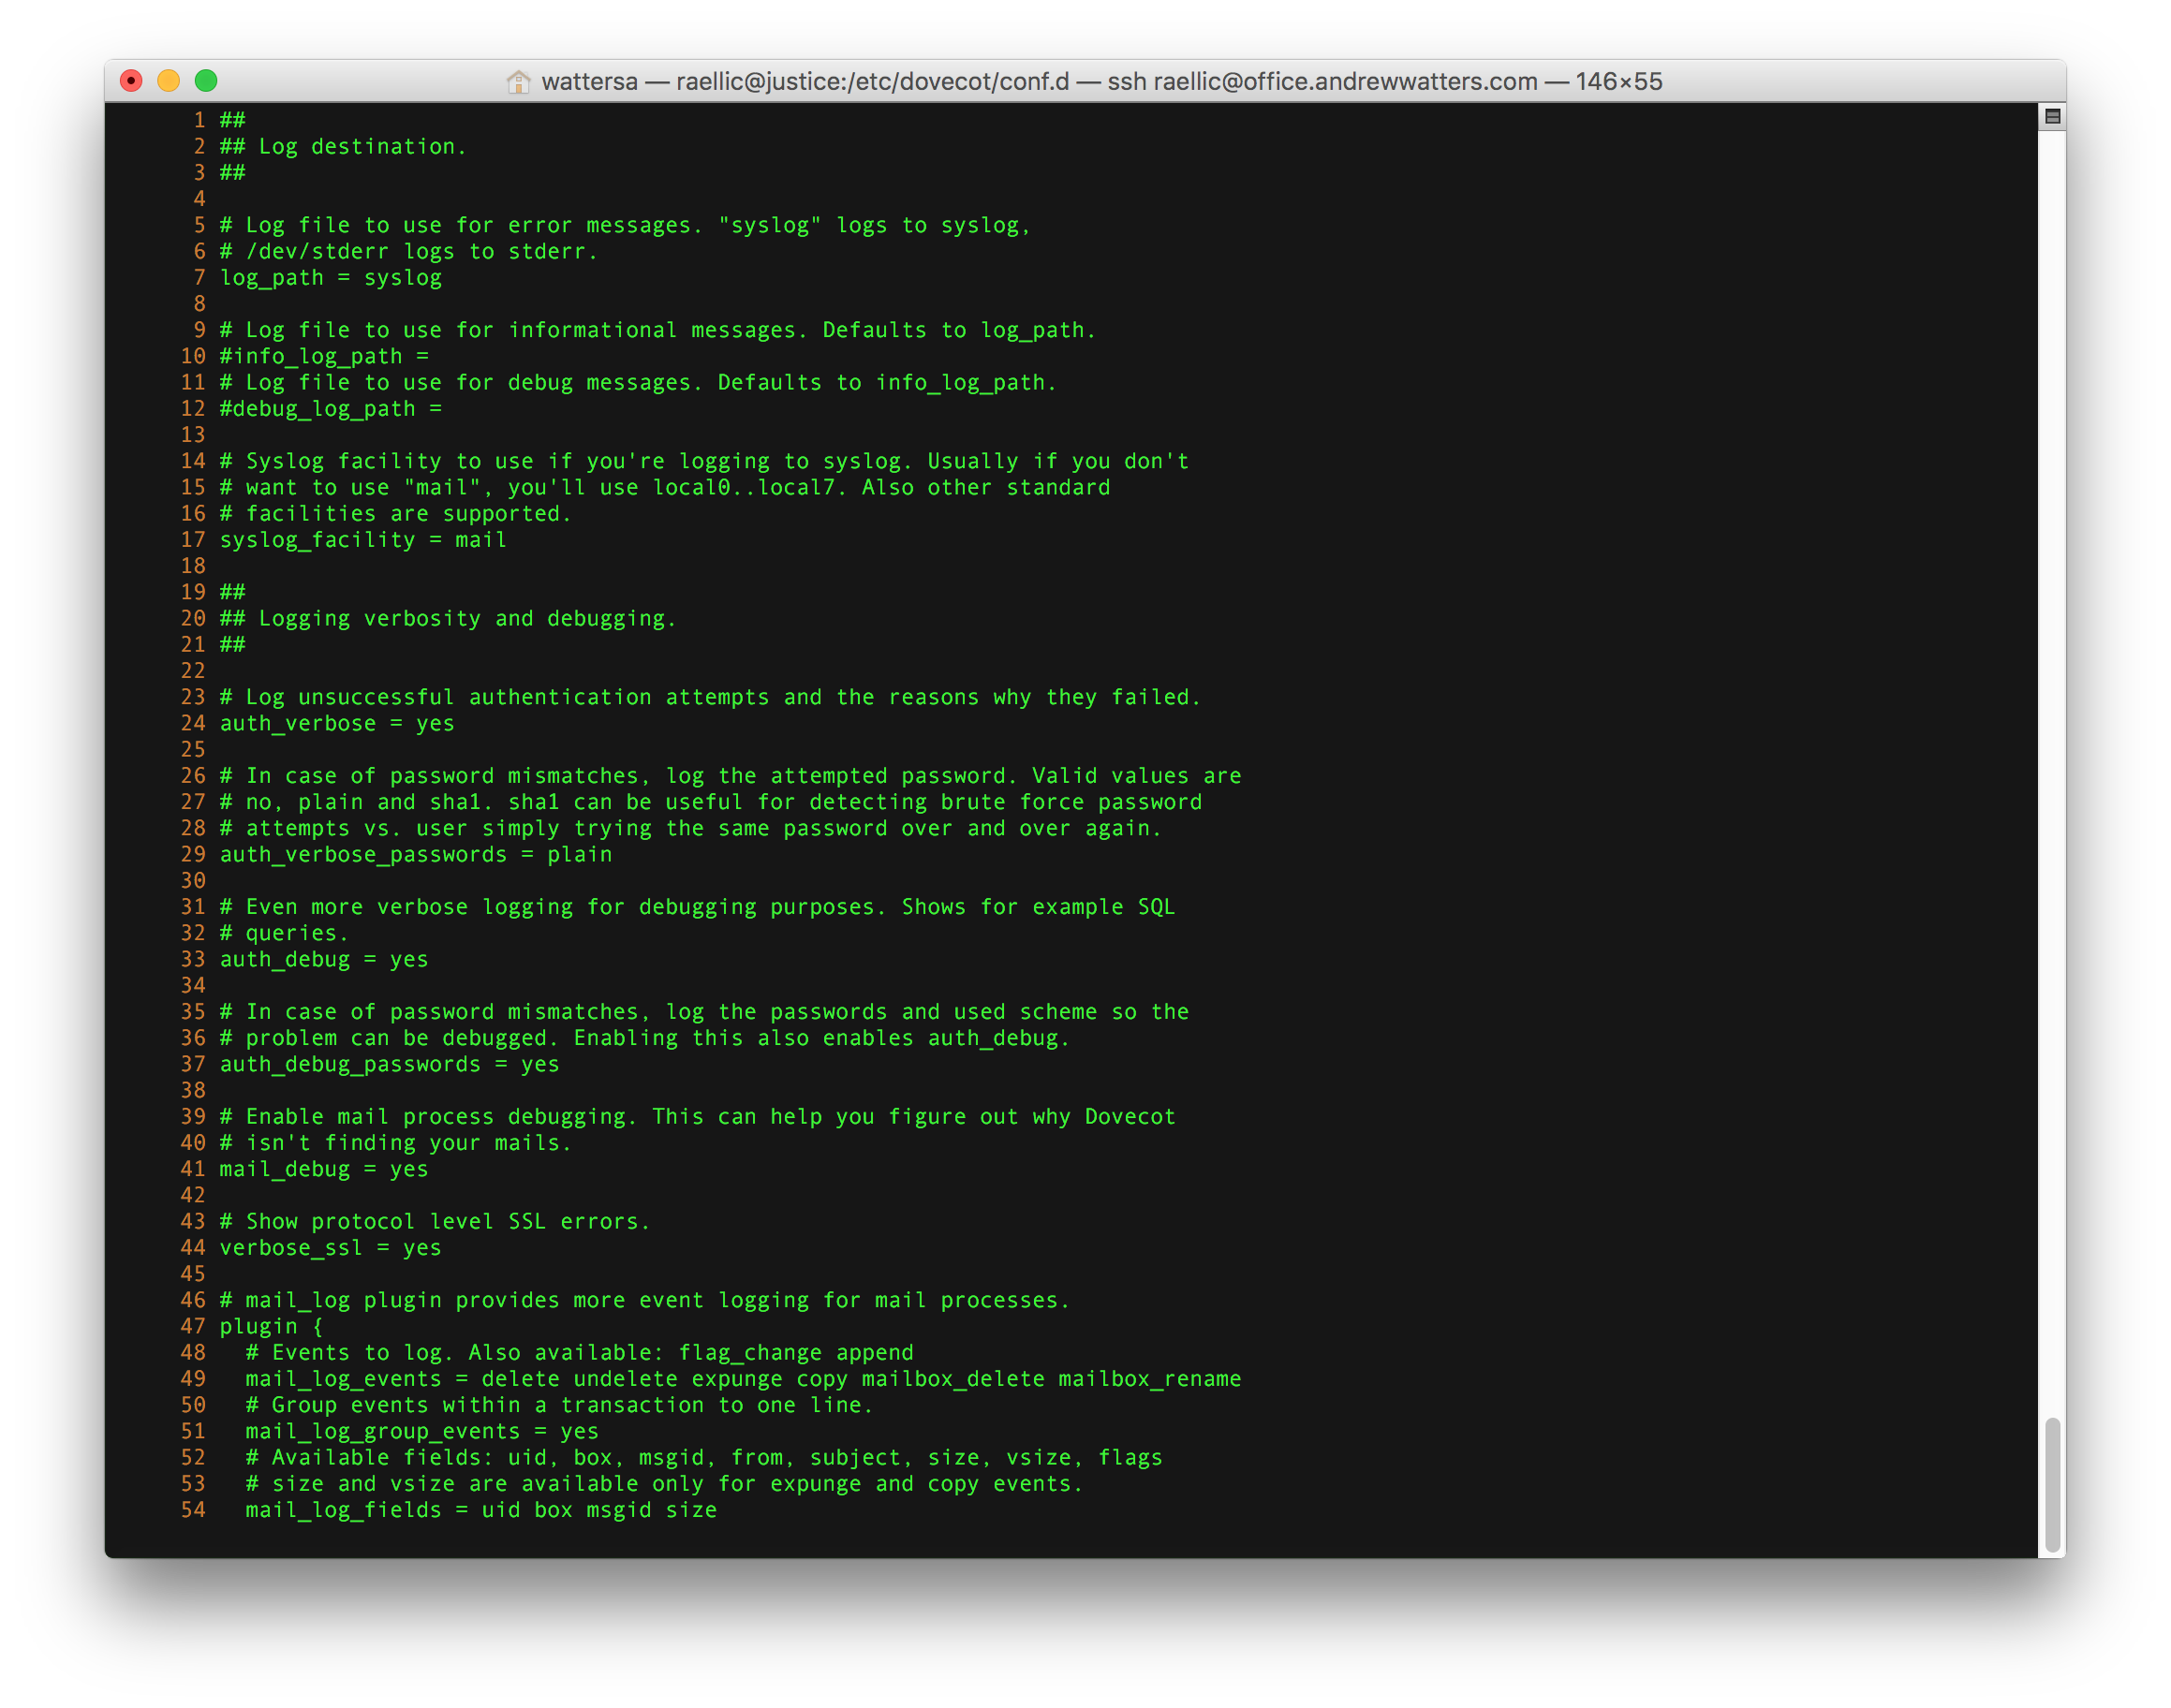
Dovecot
Dovecot is a great IMAP and POP server. It's like Postfix in that there is a vibrant community maintaining and supporting it. It's also free. So it just makes sense. Fortunately, Dovecot is included in the RHEL repository, so there is no compilation or source configuration needed. Dovecot is not installed by default, so you need to install it:
sudo yum install dovecot
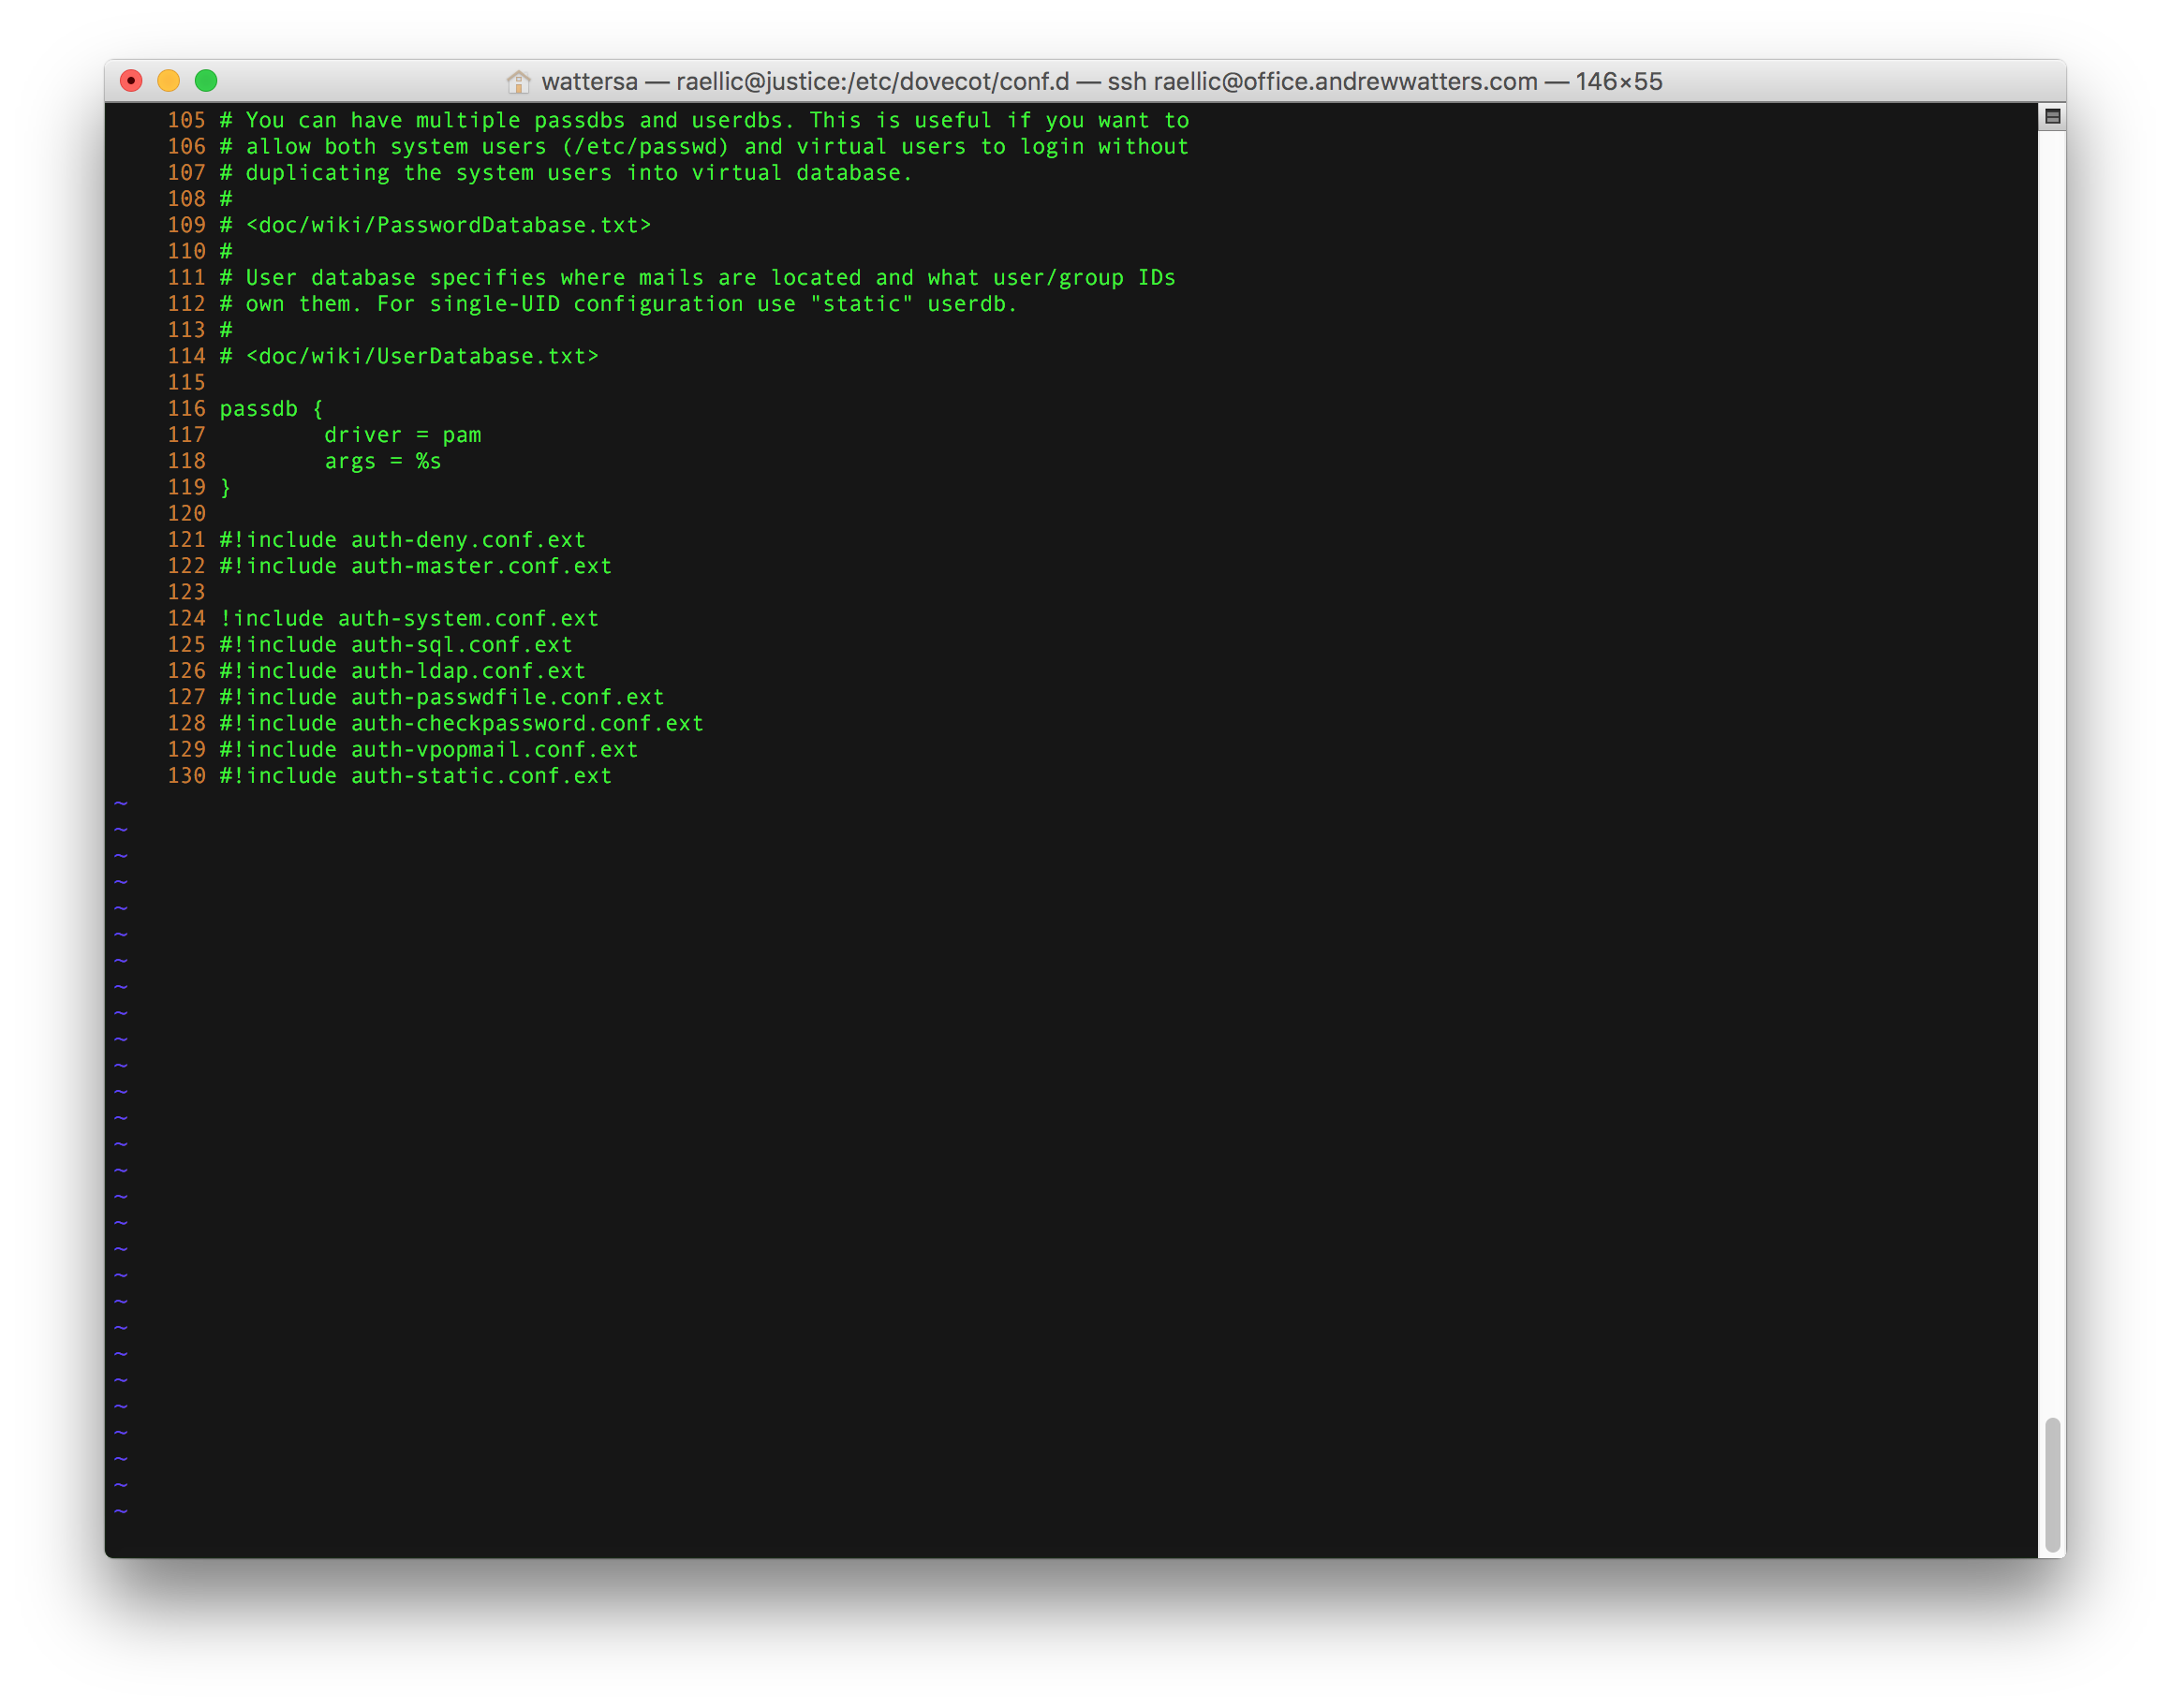
There are two options for which user Dovecot uses to deliver mail. First, you should create a user such as vmail to deliver messages and then set it in the Dovecot configuration. Dovecot will switch to that user before delivering mail, which is far more secure than the second option, setuid root. If you really want to, you can setuid root for dovecot-lda by issuing the following command: "chmod 04750 /usr/local/libexec/dovecot/dovecot-lda". This permits Dovecot to enter any user's Maildir and deliver messages as the root user. Although insecure because it would allow local users to potentially escalate privileges, it's really a practical way to deliver mail to multiple users using one mail delivery user on a system where you don't have to worry about outsiders escalating privileges. See here for more information.
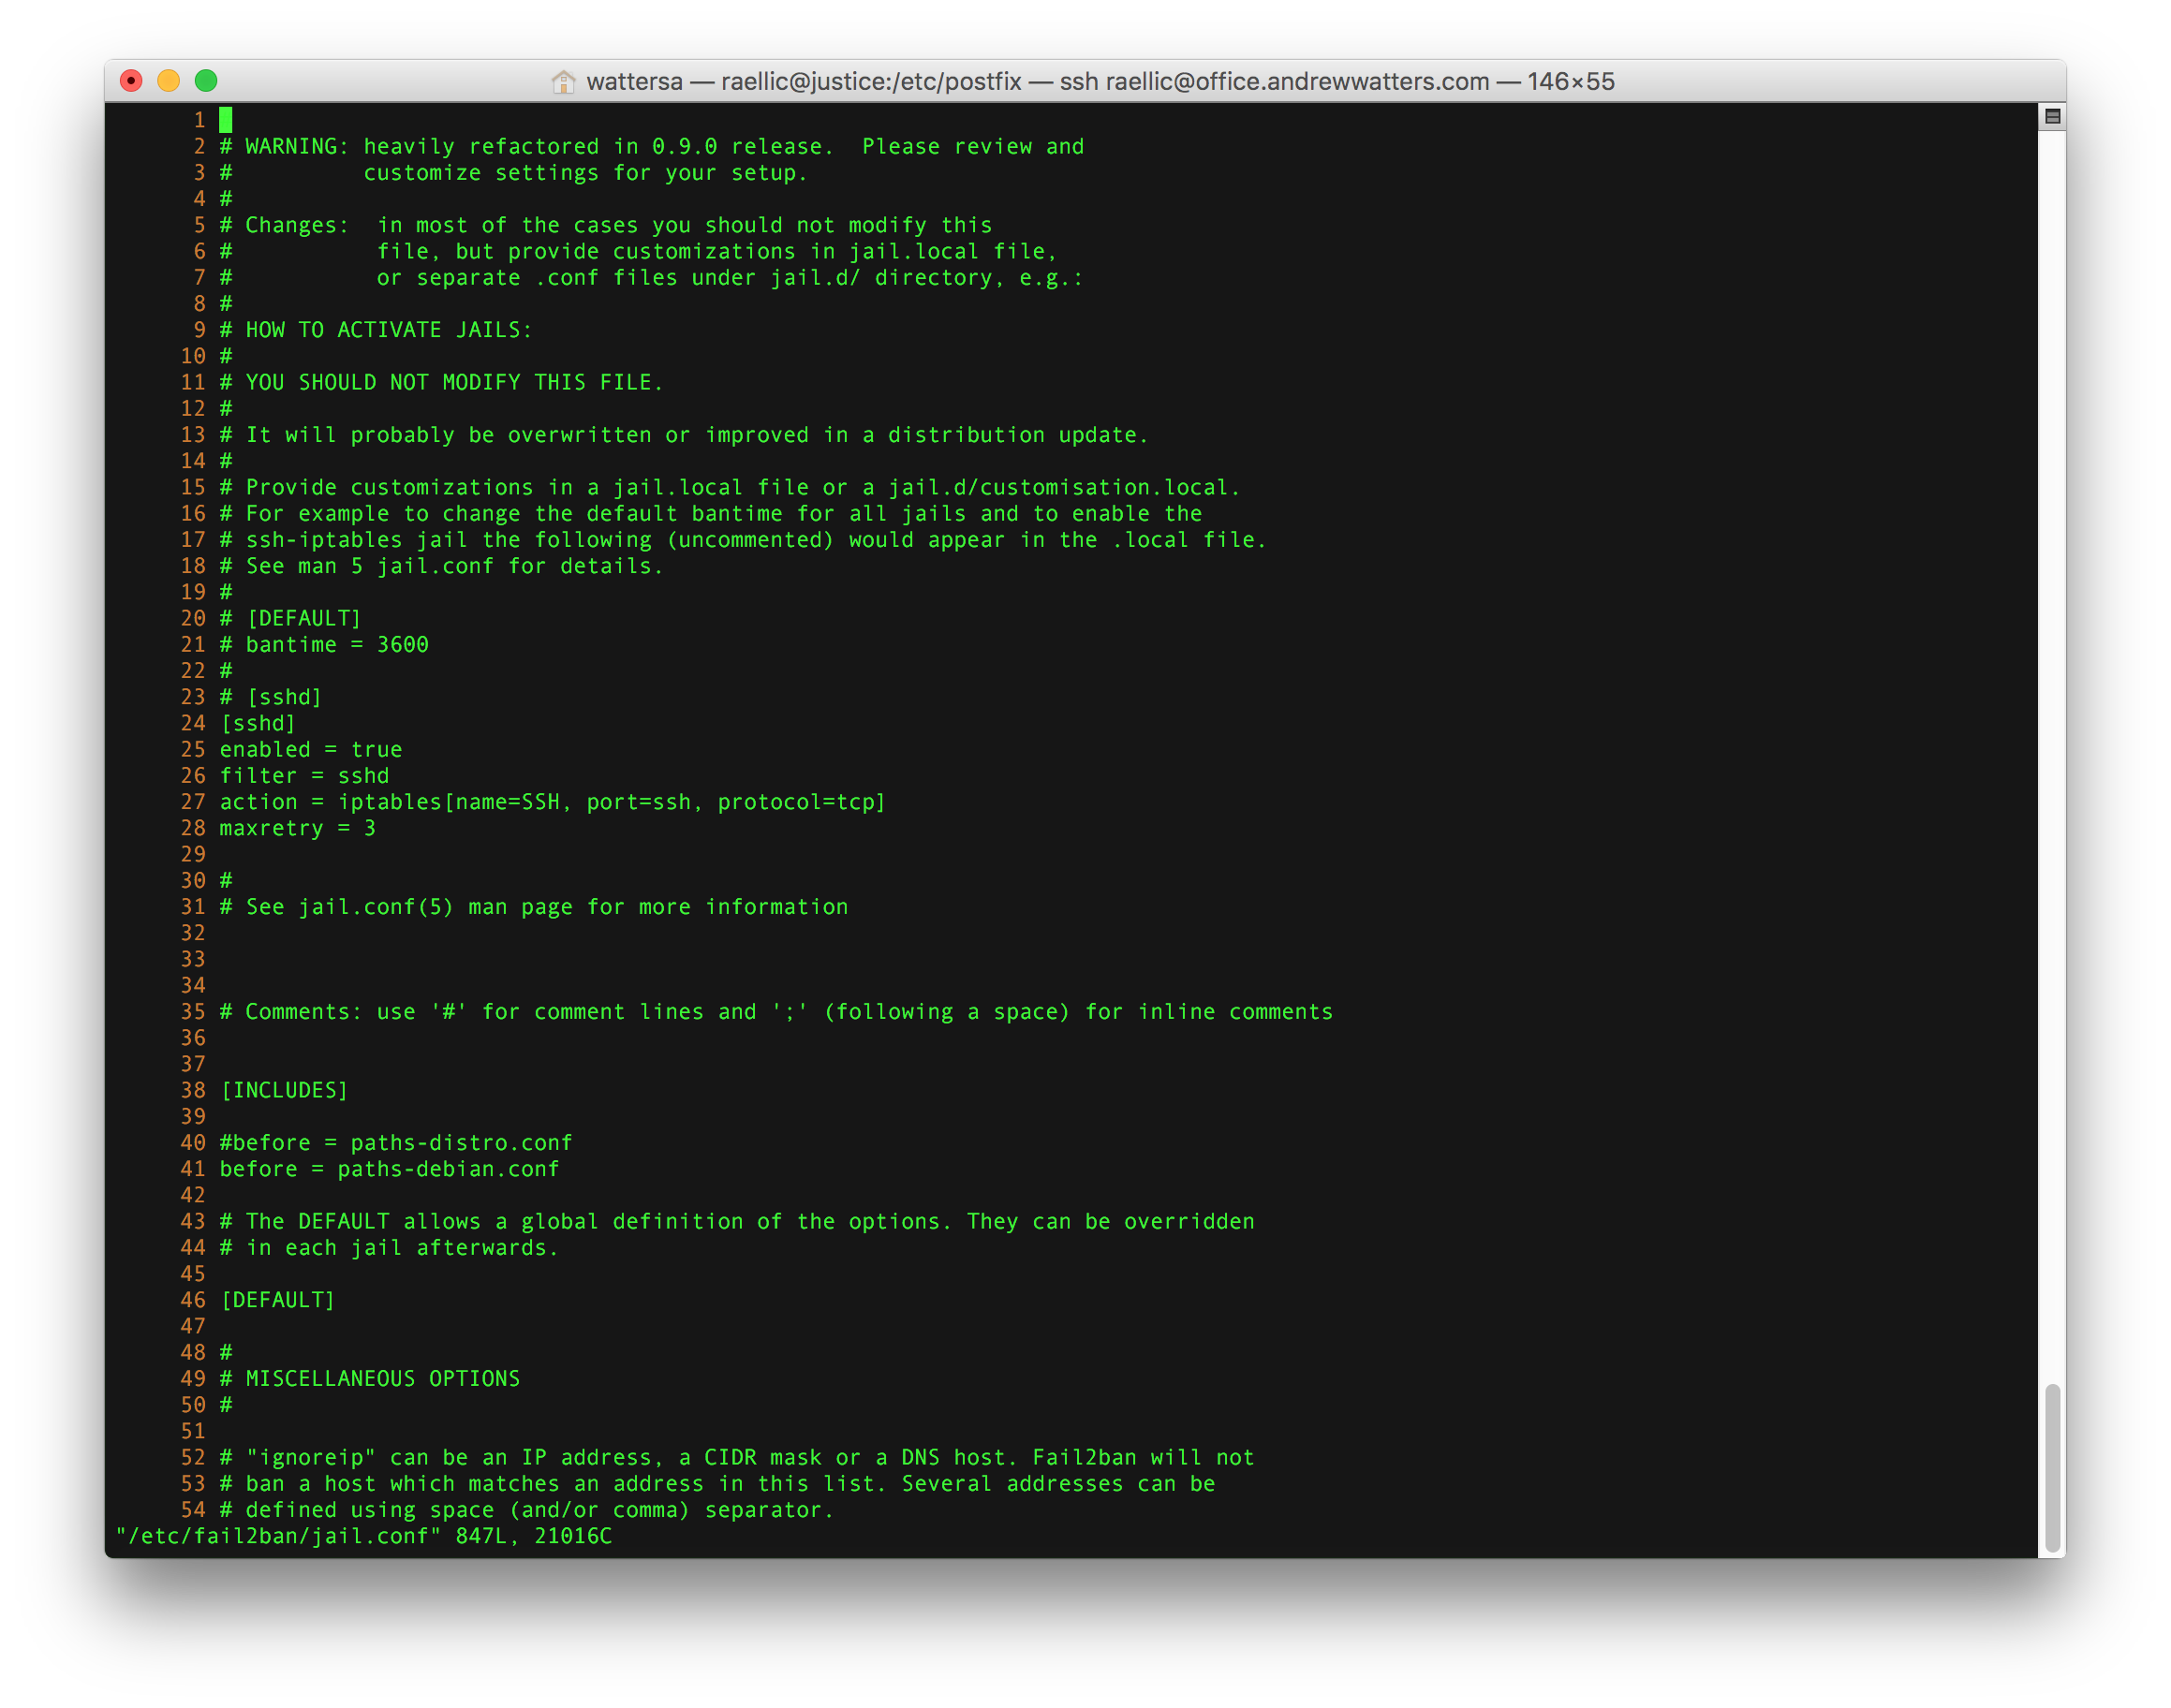
Fail2Ban
Fail2Ban is a great tool that automatically bans IP addresses when someone has a number of authentication failures to your server. It does this by examining your server log files to find authentication failures, and then adding those IP addresses to your server's firewall for a limited time (the ban time is customizable). Fail2Ban was previously not included in RHEL or in the RHEL repository but now it is in EPEL apparently. Either way, your best bet is to install it from the repository unless you want to compile it from source (official site). There is an install script that you run as root to get everything installed. After that, you must configure jail.conf and then start fail2ban from the command line.


Conclusion
If you followed the above exactly right, you should have a functioning email server. If it didn't work, feel free to email me at andrew@andrewwatters.com and I'll see what I can do. Or if you want me to set up your server for you, I charge $200 per hour and it takes 10-20 hours ($2,000 to $4,000). Good luck, and happy emailing.
© 2026 Andrew G. Watters
Last updated: October 20, 2025 05:12:05
Telemetry: page generated in 0.1 milliseconds for user at 216.73.217.25 on 2026-07-22 13:19:53